 | ||
| Your browser is not supported. | ||
|
Please browse our site using any of the following options:
| ||
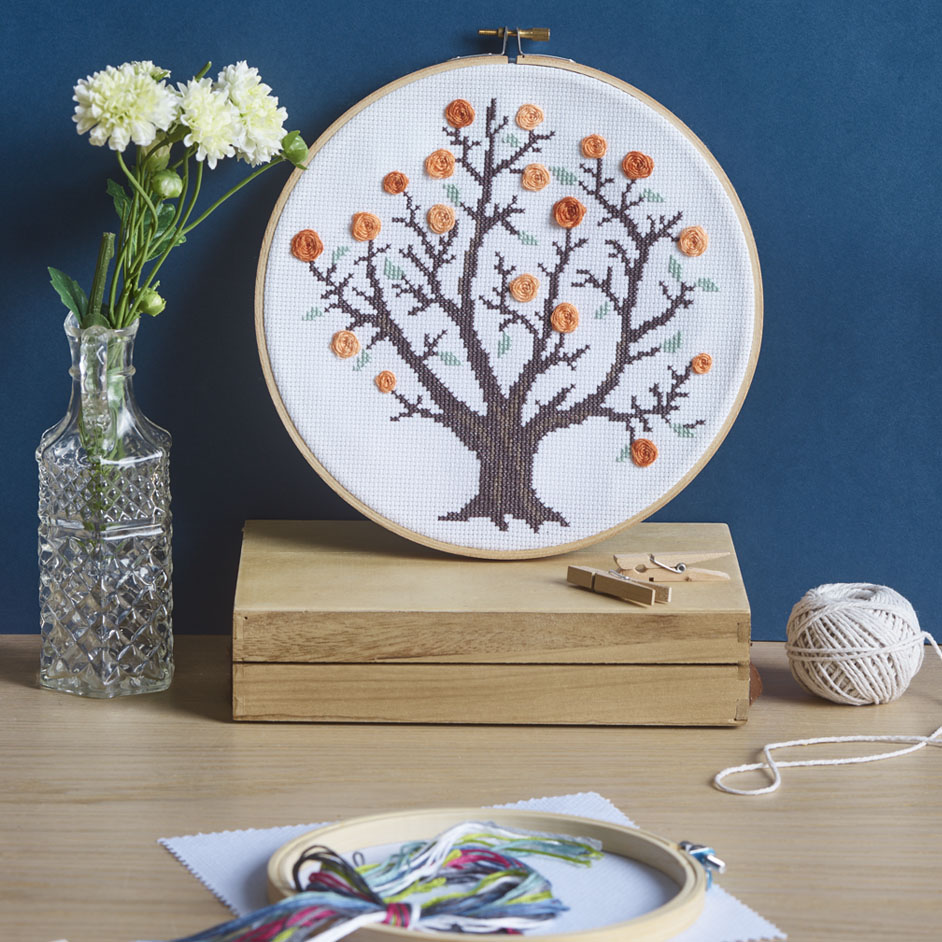
TREE CROSS STITCH

LEVEL: INTERMEDIATE
WHAT YOU'LL NEED:
- DMC Stranded Cotton - 1 skein each 08,09, 3817, 722, 922 and 3825
- 14 count white or black Aida 25 x 25cm
- DMC Tapestry Needle size 22
- 20cm embroidery hoop
- 1 sheet of felt with adhesive backing
Finished size: 20cm round
INSTRUCTIONS
Step 1 -Start by finding the center of the fabric, fold it into quarters to make a crease - this will show you the middle. You will start stitching from the center of the design. To mark the center point make a small dot with Water Soluble Pen.
Step 2 - To begin stitching, thread the required colour onto the needle and bring the needle from the back of the work through to the front.
NOTE: Your DMC Stranded Cotton has 6 strands - use 2 strands for Cross Stitch.
Step 3 - Draw the yarn through leaving a 3cm tail at the back. Hold this tail, so your first few stitches are worked over it. This will secure your thread evenly. Never tie a knot in your thread.
Step 4 - Start with diagonal stitches from bottom left to top right, work the line in that thread colour. Then working back over those stitches from bottom right to top left, cross over back to where you started. You should now have your line of crosses.
NOTE: When stitching, make sure you don't pull the thread too tight as this can make the work uneven.
Step 5 - Follow the chart and key on next page, finishing each colour before you go onto the next.
Step 6 - To end off your thread, take your needle through to the back of your work and run it under a few stitches then trim cleanly.
Step 7 - Woven Roses. Use 4 strands of cotton to stitch Woven roses. Stitch five straight stitches for spokes. Bring your needle up in the center and begin weaving the floss over and under the spokes. Alternate - going over, under, over, under each spoke. Do not pull thread to tight. When you spiral around towards the end, you will notice the previous stitches begin to cuddle and bulk together the more you add on the outside. If you want your flower to be flat, make sure to let the threads lay loosely and do not pull too tight. If you add more and more rounds to the flower the flower becomes more and more raised - creating a quite different effect.
Step 8 - To finish off trace outlines of the hoop onto felt with adhesive backing. Cut it out. Peel the backing paper and stick felt to the back of the hoop


