 | ||
| Your browser is not supported. | ||
|
Please browse our site using any of the following options:
| ||
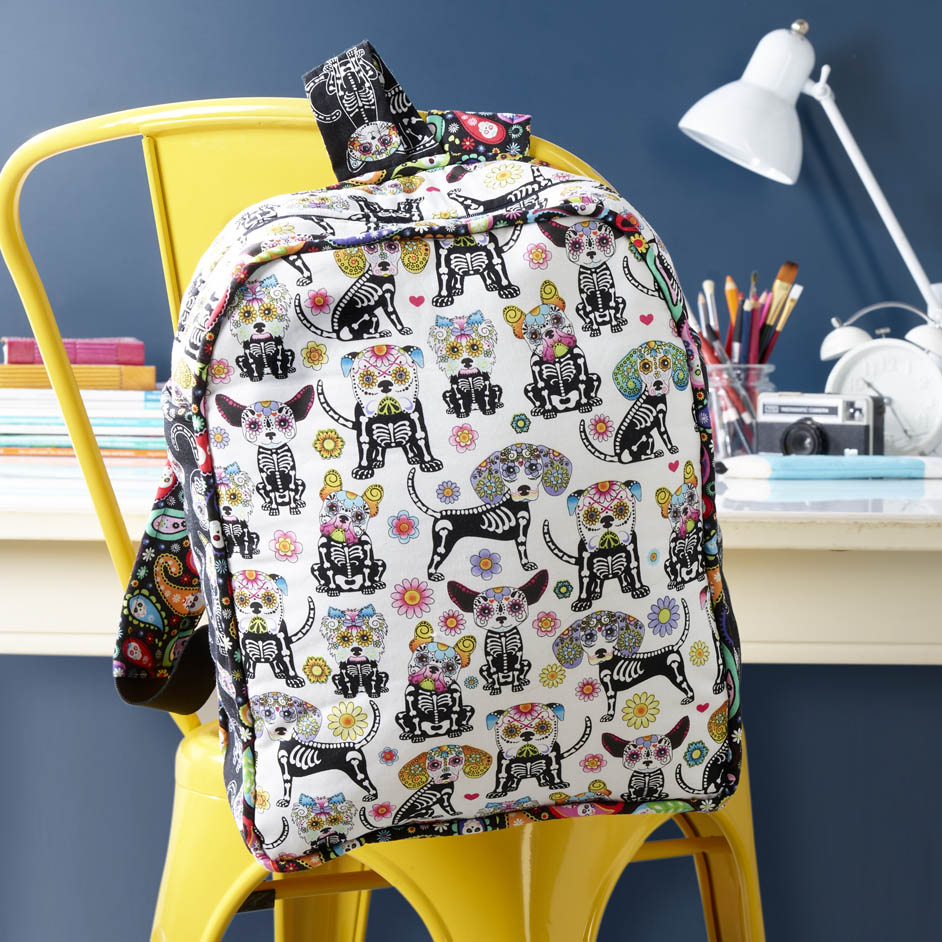
CALAVERA KIDS BACKPACK

LEVEL: INTERMEDIATE
WHAT YOU'LL NEED
- 80 cms, 112cm x wide Dog skeletons white, HS-C5012 (Main fabric)
- 1.2 metres, 112cm x wide Paisley skulls black, HS-C5013 (Lining/Contrast 1)
- 30 cms, 112cm x wide Cat skeletons black, HS-C5015 (Contrast 2)
- 80 cms, Fusible Fleece
- 3 metres No 4. Piping Cord
- 46cm Nylon Dress Zip, black
- 40cms x 5cms wide Elastic, black
- Scissors, matching thread
- Tape measure
- Sewing Machine, regular and zipper foot.
- Iron
INSTRUCTIONS
Step 1. Bag Face/Back: Cut 2 of each in main fabric, lining & fusible fleece. Sides and Pocket (inc pocket lining): Cut 2 of each in main fabric, lining & fusible fleece, and cut 4 in contrast 2 (for pockets).
Base: Cut 1 of each in main fabric, lining & fusible fleece.
Top (zipped insert): Cut 2 of each of main fabric, lining & fusible fleece.
Straps: Cut 2 in contrast 1 & the fusible fleece as per diagram.
Tab: Cut 2 in contrast 1.
Piping: Cut strips in Contrast 1 fabric on the bias 5cm wide, and join to make approximately 3 metres of piping
Elastic: Cut 2 lengths 19cms long
Step 2. Piping: join bias cut lengths and with wrong sides facing, fold around piping to encase piping cord, sew using a zipper foot and sewing close to the piping cord.
Tab: With rights sides facing, pin and sew along sides(long) using a 1cm seam allowance, turn to right side and top stitch along each side edge 1cms in from seam.
Step 3. Straps: with rights sides facing, fold straps in half length ways, pin and sew using a 1cm seam allowance. With rough side up of fleece, lay the strap over fleece with seam overhanging. Fuse using iron set to suit face fabric. Turn straps to right side. Fold in 1.5cm on one end of each of the straps, insert elastic 1.5cms and pin in place. Top stitch along each side edge 1cms in from seam on sides, and 3mm from end over elastic, reinforce elastic by top stitching backwards and forwards over width.
Step 4. Pockets: pin piping along the top of 2 pocket pieces, with placement so that the stitch line will be 1.5cms from edge and close to piping cord. With right sides facing pin pocket lining to top and sew in place using zipper foot, using a 1.5cm seam allowance. Turn to right side and press. Stay stitch 1cms along sides and base to keep pieces aligned.
Step 5. Zip insert: fuse fleece to zip insert pieces (main fabric). With right sides facing, pin zip to facing, so stitch line close to teeth will give you a 1.5cm seam allowance. Stitch in place, repeat for other side. Fold back press, and top stitch seam 1cm in from seam. Zip together leaving 5cm open at the top.
Step 6. Front and Back main fabric: Fuse fleece to front and back, place straps & tab in position as per diagram, pin and stitch piping around all edges of both pieces, with stitch line 1.5cms in from edge, and joining along the centre base edge.
Step 7. Assembly: Fuse fleece to base and sides (main fabric). With right sides facing pin and sew sides to end of the zip insert, using a 1.5cm seam allowance. Place pockets in place over side panels and pin. With right sides facing, pin base to side panels and stitch in place using a 1.5cm seam allowance. Pin completed insert to front and back bag pieces, easing around curve, clipping corners to mitre. Stitch in place using zipper foot and a 1.5cm seam allowance. Turn to right side.
Step 8. Lining: Press Insert pieces with a 1.5cm seam allowance along 1 long edge. Assemble lining and sew as with the main bag, omitting, zip, strap, tab and pockets. Place lining inside bag with wrong sides facing. Pin and hand sew lining to wrong side of zipper fabric.


