 | ||
| Your browser is not supported. | ||
|
Please browse our site using any of the following options:
| ||
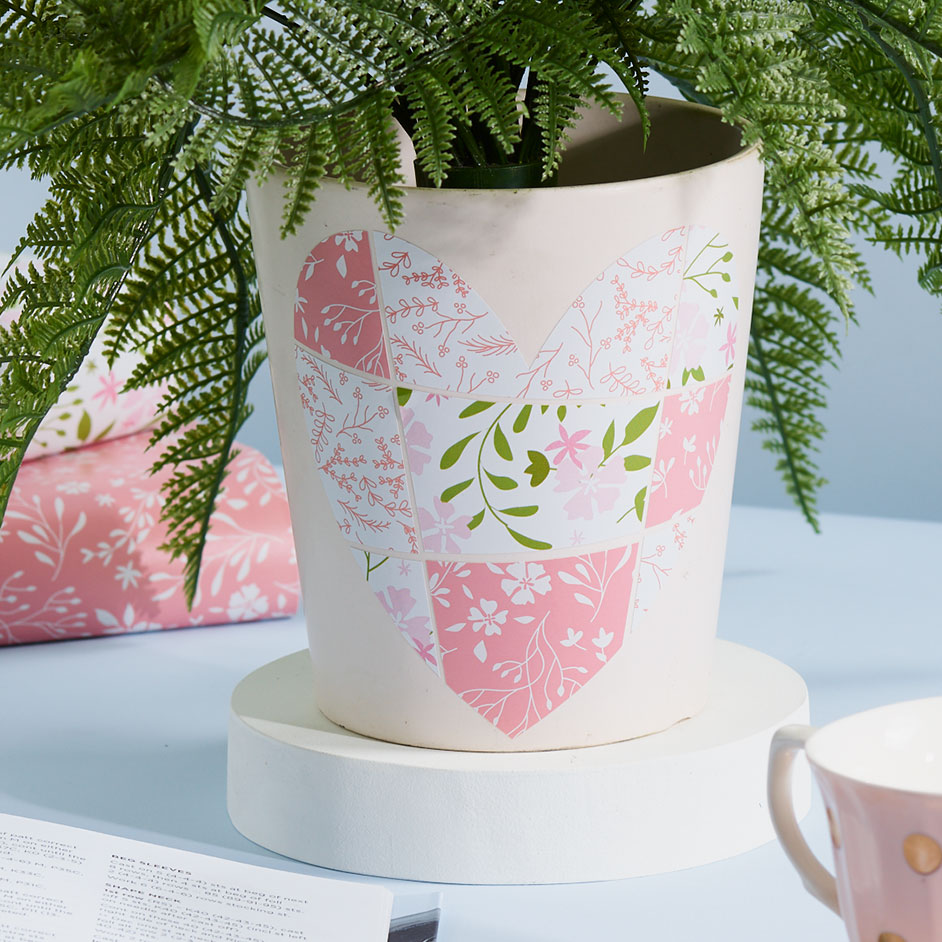
CRICUT PATCHWORK HEART PLANTER

LEVEL: EASY
WHAT YOU'LL NEED:
- 4 sheets of Cricut Patterned Vinyl
- Pot plant
- Cricut Explore or Maker
- Weeding Tool
INSTRUCTIONS
Step 1 - Add a simple heart shape to your canvas using the shape tool.
Step 2 - Then insert a square from that same menu.
Step 3 - Click the little lock icon in the lower left of you square, this will allow you to change the dimensions instead of constraining it to a square.
Step 4 - Change your square into a long, skinny rectangle and place over your heart shape.
Step 5 - Duplicate this line 3 times and create a hash mark pattern over the heart shape. For the second two lines, use the rotate icon in the upper right of your rectangle.
Step 6 - Once you have all four lines, use the rotate icon to rotate the lines slightly so they aren't straight but create a cute patchwork pattern.
Step 7 - Next use the slice tool to cut the lines out of the heart shape. You can only slice 2 items at a time so you will have to do this step 4 times. Select one of the lines and the heart shape and click Slice in the bottom of the right-hand Layers Panel.
Step 8 - You'll be left with a bunch of left-over shapes. Delete the black line (both the part inside the heart and the two lines outside the heart, plus the extra lines inside the heart). You will know when you're done deleting as you can see the canvas between the parts of your heart shapes. Continue to do this with the other 3 lines until all your lines are sliced out of the heart.
Step 9 - Cricut Design Space still sees this as a single image that you can't ungroup or detach, so to work around this, we're going to use the Contour tool. Start by creating three additional copies of your heart so you have four. I have four patterns I want to use, so I made four copies. If you have more or fewer patterns you want to use, adjust your copies accordingly.
Step 10 - Then, for our original heart, we're going to use the contour tool to "delete" all but two of the different pieces of our heart. Select it and click Contour in the bottom of the Layers Panel. A screen will pop up and you can just delete the pieces of the heart you don't want showing. We left the top middle and bottom right piece for this first layer. Recolour that first layer so you know which pieces belong together.
Step 11 - Next drag a new copy of the heart over the original and delete different pieces, making sure to colour them a different colour than your first heart. Repeat with the other two heart copies until you have four separate contoured hearts making one complete patchwork heart.
Step 12 - You can see in the Layers Panel that you have four different images now, coming together as one patchwork heart. Resize to the size you'll need for your planter pot. Then load the mat and cut each layer from the four Vinyl patterns!
Step 13 - Once your pieces are cut out, use the weeding tool to remove the negative space around your heart pieces. Then layer them onto your planter so you can see how they will place, making sure to leave a small amount of space between each piece before sticking onto the planter surface!
Step 14 - Fill planter with your favourite plant and give to a loved one for a unique gift!


