 | ||
| Your browser is not supported. | ||
|
Please browse our site using any of the following options:
| ||
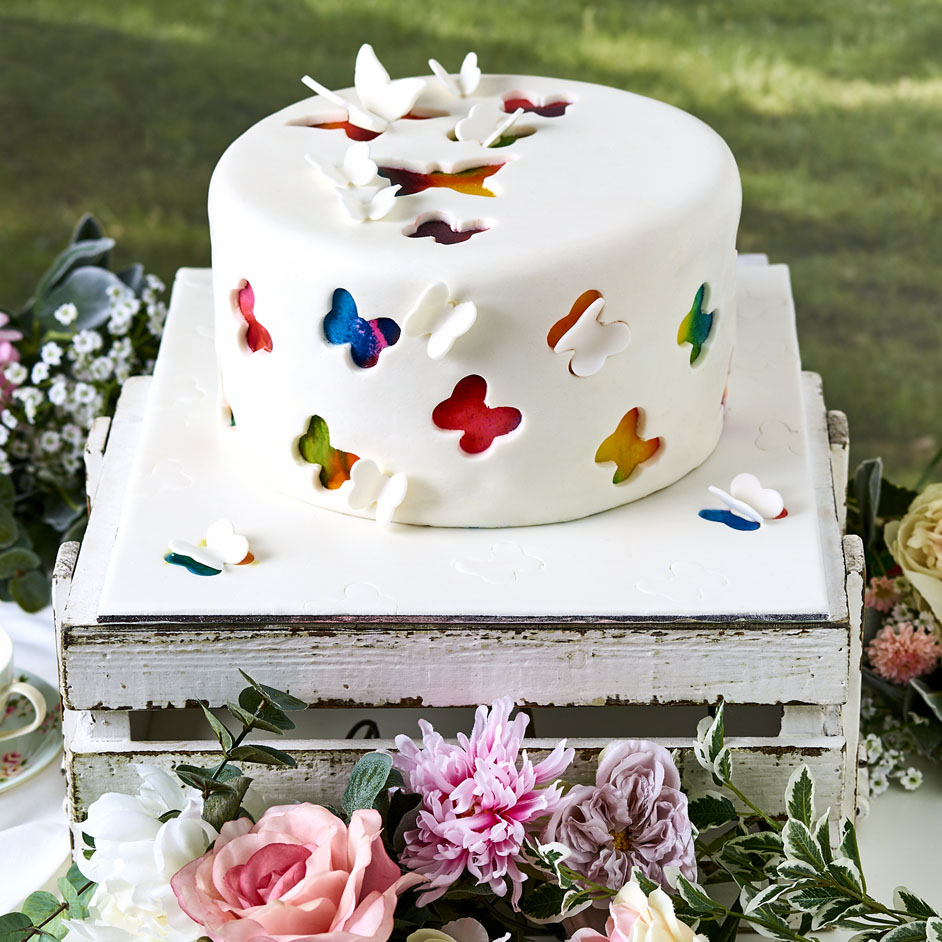
BUTTERFLY CUT-OUT CAKE

LEVEL: EASY
WHAT YOU'LL NEED:
- Bake 2 x 10" Cakes
- White Fondtastic Fondant
- Butterfly cookie cutter (in 2 sizes)
- Roberts Rectangle Cake board 14"
- Airbrush coloured dyes (various colours)
- Roberts Chocolate Mud Cake Mix 1 x 2kg & 1 x 1kg
- Over the top Buttercream
- Chocolate ganache
- Satin Ice white Gum paste
- 10g white chocolate
- 10" round cake boards x 2
- Angled spatula 10cm and 30cm
- Acrylic Rolling Pin min. 50cm wide
- Fondant smoother
- Vegetable Shortening i.e. Copha
- Turntable
INSTRUCTIONS
Step 1.Prepare chocolate ganache (this is best prepared the night before)
Step 2.Using the butterfly cookie cutters cut out varying sizes using the gum paste. Place some baking paper on top of an open book, and arrange the butterfly cut outs in the seam on the book to give the butterflies the flying, wings up look.
Step 3.Let these dry & harden for few hours. The earlier you prepare these, the better
Step 4.Line the base and sides of cake tin with baking paper
Step 5.Bake 2 x 10" cakes using Roberts Chocolate mud cake mix. Refer to instructions on the back of the pack
Step 6.Secure first cake on a cake board with some ganache in the middle
Step 7.Then pipe the perimeter of the cake with buttercream using Wilton tip #2A
Step 8.With a spatula fill the inside of the cake with more buttercream until it is all covered
Step 9.Next place the second cake over the first cake and spread a layer of ganache, to cover the top. (Before using ganache, make sure it is of a smooth, spreadable consistency, microwave in 10sec bursts until you achieve this).
Step 10.Smooth the thick layer of ganache on top of the cake
Step 11.Then using a 10" thin cake board, place it over the ganached top of the cake, foil side down. Using an angled spatula cover the cake with more ganache between the two cake boards, from top to bottom.
Step 12.With a scraper, smooth the cake as you gentle spin it until it is all even and smooth. Fill in any gaps that might appear with more ganache and keep smoothing, until you are happy with the result
Step 13.Place in fridge for an hour to harden
Step 14.Retrieve cake from the fridge. Remove the top cake board slowly and the top of the cake should be all smoothed out. If there are any uneven edges around the cake, grab a sharp knife, dip it in some hot water and gently cut excess ganache until you have sharp edges
Step 15.Roll out some white fondant, about 3mm thick
Step 16.Place cake on bench top and gently place rolled out fondant over the cake
Step 17.Using a fondant smoother, smooth the fondant out starting from the top. Spin the turntable as you smooth it out, slowly, making your way to the bottom of the cake
Step 18.Cut away any excess fondant. This will be your first layer of fondant to be airbrushed
Step 19.Measure out some more fondant about 3mm thick, to cover the rectangle cake board hollowing out the centre where the cake will sit. This will be the first layer with some airbrushed sections
Step 20.Set up the airbrush dye colours and spray a colour in random spots over fondant around the cake. Repeat this step with as many colours as you wish until the rainbow effect you like is achieved, and the whole cake is coloured
Step 21.Repeat this step for the fondant covered cake board, by airbrushing, using varying colours in the four corners of the cake board
Step 22.Allow drying for at least 16 hours. The longer the better so no colours smudge
Step 23.Roll out another layer of fondant, this time 10mm thick. As the fondant is thicker and heavier with this layer, you need to be careful to avoid any tearing. Use some vegetable shortening to soften the fondant whilst kneading, if you feel it is drying out.
Step 24.Cover the airbrushed cake with the thicker layer of fondant, again smoothing it out, starting from the top as you spin the turntable and work your way down to the bottom
Step 25.Cut away any excess fondant
Step 26.Cut out another layer of fondant to cover the fondant covered cake board as well, again hollowing out the centre where the cake will sit
Step 27.Once you're happy with the fondant-covered cake, place it on the fondant covered square cake board in the centre. Secure it down with a little ganache or buttercream
Step 28.Using both butterfly cutters, gently cut out the top of the cake where you would like the rainbow colours to show through, remembering that there are two layers of fondant, so you do not want to push the cookie cutters in too deep and only deep enough to remove the top 10mm layer of fondant
Step 29.For each butterfly cut out, gently peel that layer of fondant off, revealing the rainbow-airbrushed effect underneath
Step 30.Repeat this until the desired amount of butterfly cut outs is achieved on and around the sides of the cake
Step 31.Next repeat the previous step in the four corners of the cake board. Gently peel away one butterfly in each corner to reveal the rainbow coloured effect underneath
Step 32.Next, melt some white chocolate to use as a paste & glue the pre prepared flying butterflies to a couple of the rainbow butterfly cut outs, to give the 3D look.


