 | ||
| Your browser is not supported. | ||
|
Please browse our site using any of the following options:
| ||
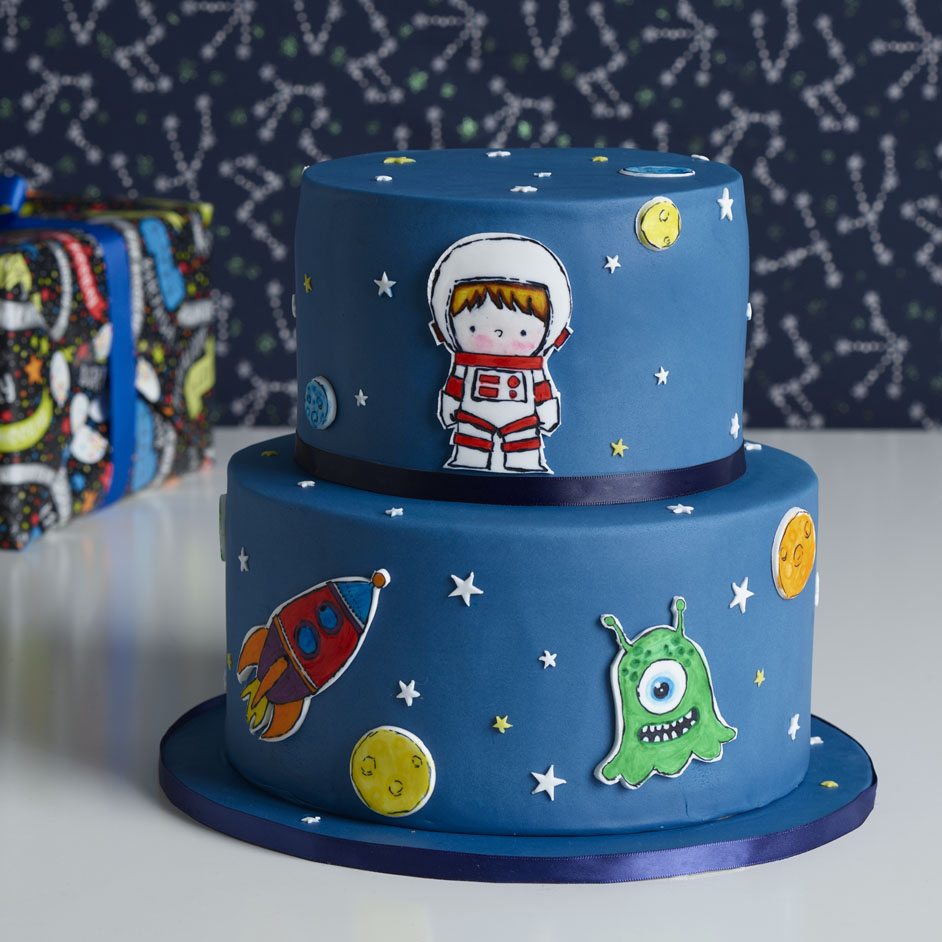
SPACE CAKE

LEVEL: EASY
WHAT YOU'LL NEED:
- 6 inch round Mondo pro cake pan
- 8 inch round Mondo pro cake pan
- Cake mix/batter to make 2 x 3-4 inch high cakes in above sized tins
- 10 inch white or black Mondo round cake board
- 6 inch round Mondo silver compressed cake board
- 8 inch round Mondo silver compressed cake board
- Mondo cranked spatula
- Mondo cake turntable
- 2 - 3 tubs over the top buttercream in your choice of colour (more required if filling cake layers refer step 2 & 3)
- Piping bag Mondo 45cm
- 2 x 908g tubs Royal blue fondant (optional if having final fondant cover refer step 3)
- Fondtastic mat
- Sharp knife
- 225 g pot white Fondtastic Fondant or Gumpaste to complete decorations
- 1 packet Chefmaster edible pens
- Small paintbrush
- Over the top edible glue
- Mondo star plunger cutters
- Mondo Cake knife
- Mondo Fondant knife
- Wide plastic drinking straws
- 130cm of ribbon for decoration (your choice of colour)
INSTRUCTIONS
Step 1. Baking
Bake cake according to instructions. 3 x 1 inch high layers of 6 inch and 8 inch rounds. Alternatively, you can use 3-4 inch high cakes without torting (filling) layers with buttercream if you choose. Let cakes cool and trim to level.
Step 2. Buttercream filling
Stack cakes on cake board with buttercream in between layers. Makes sure base of cake is stuck to cake board using buttercream or melted chocolate. It is easier to torte and cover cakes using piping bag to apply buttercream. Don't over fill piping bag, snip end and pipe onto each layer whilst turning cake turntable to assist with even spread. Smooth buttercream over outside of cake in thin layer with spatula and chill for at least 15 minutes (Crumb coat). This initial Crumb coat layer does not have to be perfect. The aim is to keep the crumbs of the cake from showing in the second layer.
Step 3. Buttercream cover
Repeat process of covering Crumb coat in smooth layer of buttercream for final outer layer. Chill final outer layer for 15 minutes. Warm long spatula (or metal cake scraper) and carefully spin cake around on cake turntable whilst scraping outer layer off to achieve desired effect. This will minimise outer layer becoming "dirty" with cake crumbs.
**Alternatively, you can use ganache instead of buttercream if you prefer as outer cover for cake prior to final cover in fondant. Or you can use Blue Over the top buttercream as final outer layer and not use fondant.
Step 4. Fondant Cover
Lay out Fondtastic mat. Prepare Royal Blue Fondant for each cake according to instructions. 700 - 800g of fondant for 8 inch round and 400-600g for 6 inch round cake - based on 4 inch height (you can use less if you are proficient at rolling out fondant and completing cake covers). Cover each cake in fondant. Refer to Fondtastic Facebook Page for video on how to do cake covers with Fondtastic fondant and Mat. Stack cakes carefully once fondant/buttercream has firmed a little.
STACKING CAKES
Fix 8 inch cake to 10 inch cake board. Use wide drinking straws as supports to top tier by pushing into 8 inch cake - 1 in centre and 4 within the 6 inch diameter to hold up top tier. Cut excess straw so it is level with top of 8 inch cake.
Step 5. Cover display board (optional)
Cover 10 inch cake board with fondant if you want it to colour match your cake. You can 'fix' the fondant to the board using water, edible glue or shortening.
Step 6. Decorations
Prepare fondant or gumpaste according to instructions. Roll out using rolling pin to thin layer on Fondtastic Fondant Mat. Cut out rough shapes for Astronaut, rocket ship, alien and planets using fondant knife. Allow to firm up (gumpaste will dry quicker than fondant) so they can be handled and placed on cake and or cake board as you wish. Use star plunger cutters in various sizes to cut out stars. Use base of piping tips (standard and Russian) to cut out a few circle shapes for planets.
*Precision cutting of fondant shapes you will need a sharp knife of cutting blade. Do not use these on Fondtastic mat as it will cut mat. You can do cutting on silver cake board or other cutting surface. Place Baking paper underneath decoration so it can be easily shifted once set up.
Step 7. Colouring and Placing decorations
Complete your designs using Chefmaster pens. Start with colours and you can gently blend with a tiny amount of water on your brush. Complete design using black pen for outlining. Stick to cake with edible glue if sticking to fondant, or buttercream if sticking to buttercream. Finish cake board and cake with ribbon (can use double sided tape on board and edible glue on cake)


