 | ||
| Your browser is not supported. | ||
|
Please browse our site using any of the following options:
| ||
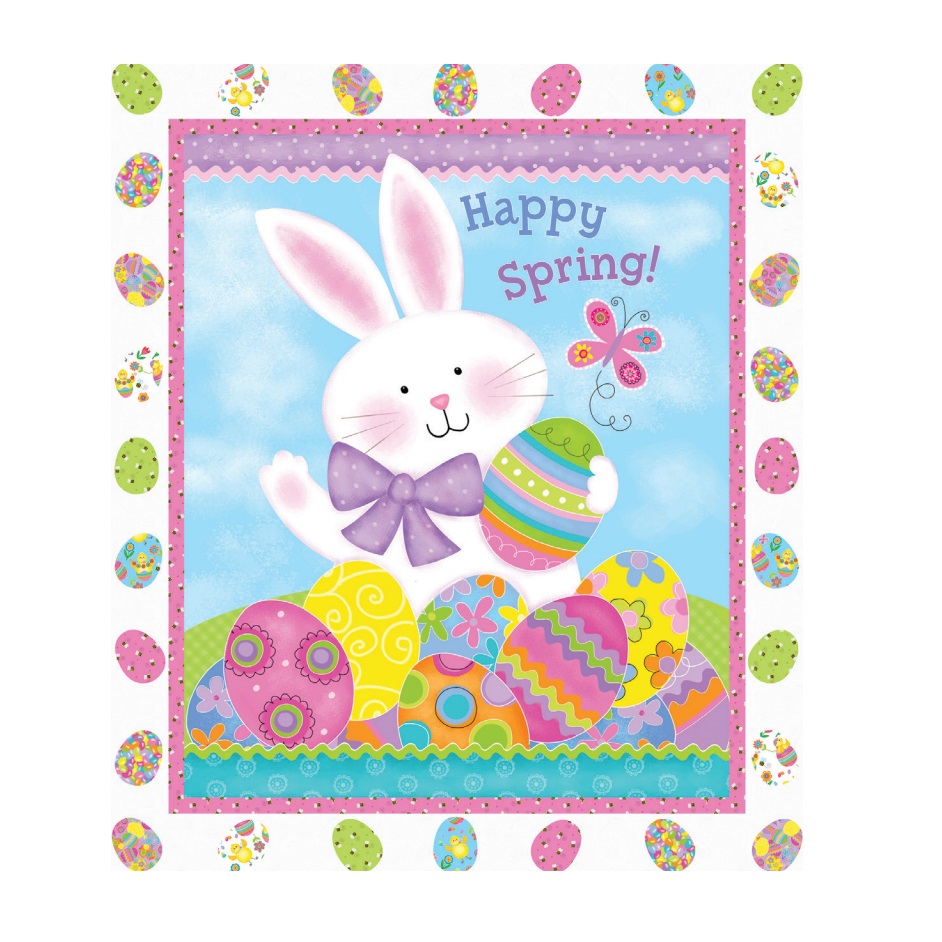
EASTER BUNNY QUILT

LEVEL: EASY
WHAT YOU'LL NEED:
- Spring Has Sprung fabric collection by Sharla Fults for Studio E:
- (A) 3900P-10 ...... 1 panel
- (B) 3904-22 ......... 46cm
- (C) 3904-60 ......... 11cm
- (D) 3905-1 ........... 11cm
- (E) 3902-1 ............ 11cm
- (F) 3907-10 .......... 11cm
- (G) 3905-11 ......... 11cm
- (H) 1351-Grape**... 80cm*
- (I) Prima Homespun White** 80cm
- (J) 3901-10 ............ 1.52m
- Backing 3902-50 .... 3.2m
*Includes Binding
**Just Color! Collection
- Batting 61" x 69" (Recommended: Air Lite Color Me 100% Cotton)
- Piecing and sewing thread
- Quilting and sewing supplies
SIZE
Finished Quilt Size 53" x 60 1/2"
INSTRUCTIONS
CUTTING
Cutting Instructions
Please note:All strips are cut across the width of fabric (WOF) from selvage to selvage edge unless otherwise noted.
WOF= Width of Fabric,LOF = Length of Fabric
Fabric A (3900P-10 36" Happy Spring Panel - Multi):
- Fussy cut (1) 35 1/2" x 43" panel.
Fabric B (3904-22 Buzzing Bees - Pink), cut:
- (5) 2" x WOF strips. Sew the strips together end to end with diagonal seams and cut (2) 2" x 43" strips and (2) 2" x 38 1/2" strips.
- See instructions to cut (4) eggs.
Fabric C (3904-60 Buzzing Bees - Green):
- See instructions to cut (5) eggs.
Fabric D (3905-1 Chicks and Eggs - White):
- See instructions to cut (5) eggs.
Fabric E (3902-1 Decorative Eggs - White):
- See instructions to cut (5) eggs.
Fabric F (3907-10 Jelly Beans - Multi):
- See instructions to cut (5) eggs.
Fabric G (3905-11 Chicks and Eggs - Blue):
- See instructions to cut (4) eggs.
Fabric H (1351-Grape Just Color! - Grape), cut:
- (3) 1 1/2" x WOF strips. Sew the strips together end to end with diagonal seams and cut (2) 1 1/2" x 53" strips.
- (3) 1 1/2" x WOF strips. Sew the strips together end to end with diagonal seams and cut (2) 1 1/2" x 47 1/2" strips.
- (6) 2 1/2" x WOF strips for the binding.
Fabric I (1351-Pigment White Just Color! - Pigment White), cut:
- (3) 4 1/2" x WOF strips. Sew the strips together end to end with diagonal seams and cut (2) 4 1/2" x 45"strips.
- (3) 4 1/2" x WOF strips. Sew the strips together end to end with diagonal seams and cut (2) 4 1/2" x 45 1/2" strips.
Fabric J (3901-10 Spring Bunnies - Multi), cut:
- (2) 3 1/2" x 55" LOF strips.
- (2) 3 1/2" x 53 1/2" WOF strips from the remaining fabric, piece as needed.
Backing (3902-50 Decorative Eggs - Lilac), cut:
- (2) 61" x WOF strips. Sew the strips together and trim to 61" x 69" for the back.
SEWING
Sew using a 1/4" seam allowance with right sides together (RST) unless otherwise indicated. Always press towards the darker fabric while assembling, unless otherwise noted by the arrows.
BLOCK ASSEMBLY
Step 1. Sew (1) 2" x 43" Fabric B strip to each side of the 35 1/2" x 43" Fabric A panel. Sew (1) 2" x 38 1/2" Fabric B strip to the top and to the bottom of the Fabric A panel. Trim the block to measure 37 1/2" x 45" to make the Center Block (Fig. 1).
Step 2. Following the manufacturer's instructions, trace the listed number of each template onto the paper side of the fusible web. Roughly cut out each template about 1/8" outside the drawn lines.
Step 3. Press each template onto the wrong side of the fabrics as listed on the templates. Cut out each template on the drawn lines.
Step 4. Refer to the Figure 2 to arrange and press (7) assorted eggs onto (1) 4 1/2" x 45 1/2" Fabric I strip.
Step 5. Finish the raw edges of each shape with a decorative stitch such as a buttonhole or satin stitch to make the Top Border.
Step 6. Repeat Steps 4-5 and use Figure 3 for fabric identification and location to make (1) Bottom Border (Fig. 3).
Step 7.Refer to Figure 4 and repeat Steps 4-5, using (1) 4 1/2" x 45" Fabric I strip and (7) assorted eggs to make the Left Side Border.
Step 8.Refer to Figure 5 and repeat Steps 4-5, using (1) 4 1/2" x 45" Fabric I strip and (7) assorted eggs to make the Right Side Border.
QUILT TOP ASSEMBLY
(Follow the Quilt Layout while assembling the quilt top)
Step 9.Sew the Left and Right Side Borders to the Center Block. Sew the Top and Bottom Borders to the Center Block.
Step 10.Sew (1) 1 1/2" x 53" Fabric H strip to each side of the Center Block. Sew (1) 1 1/2" x 47 1/2" Fabric H strip to the top and to the bottom of the Center Block.
Step 11.Sew (1) 3 1/2" x 55" Fabric J strip to each side of the Center Block. Sew (1) 3 1/2" x 53 1/2" Fabric J strip to the top and to the bottom of the Center Block to make the quilt top.
LAYERING, QUILTING AND FINISHING
Step 12.Press the quilt top and 61" x 69" backing well Layer backing (wrong side up), batting, pressed quilt top (right side up) and baste. Quilt as desired and trim excess batting and backing when quilting is complete.
BINDING
Step 13.Cut the ends of the (6) Fabric H binding strips at a 45-degree angle and sew end to end to make (1) continuous piece of binding. Fold in half lengthwise and press wrong sides together.
Step 14.Sew the binding to the front of the quilt, raw edges together. Turn the folded edge to the back, and hand stitch in place.


