 | ||
| Your browser is not supported. | ||
|
Please browse our site using any of the following options:
| ||
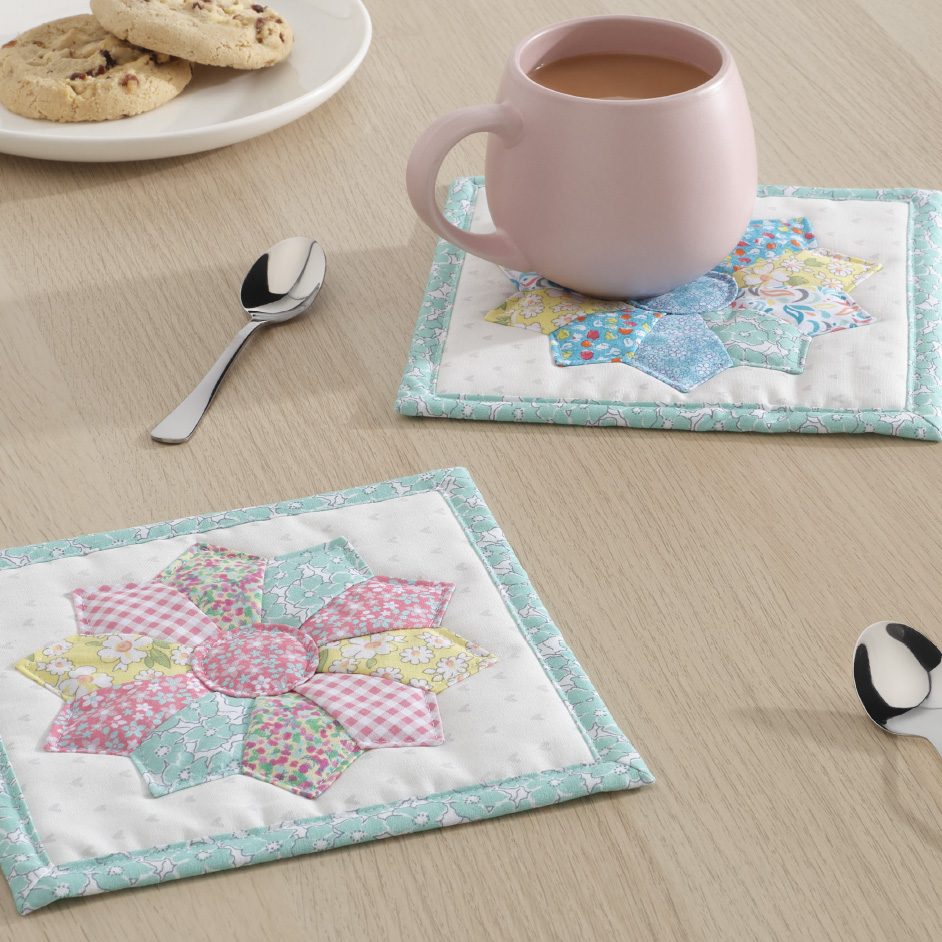
BUNDLES & JELLIES POPPY COASTERS

Level: Intermediate
What you'll need (Per coaster):
5 Piece Fat Quarter Bundle
20 cm square of white heart print cotton fabric (background)
20 cm square of Legacy Fusible Fleece
4 cm circle of light fusible interfacing
Gutermann Sewing threads - to match fabric colours
Sewing machine
Scissors, Pins, Hand needle, Iron, Ruler/Tape measure
Instructions
Reference the downloadable project sheet for project pattern diagrams.
Step 1 - Cut out from templates provided:
- 10 x Petal blade pieces from fat quarters (2 pieces from 5 different fabrics)
- 1 x Daisy center piece from one of the fat quarters.
Cut a 26 cm square from one of the fat quarters for the backing with front edging.
Step 2 - Fold each petal blade in half, right sides together, and pin the base edges together. Sew along the folded base edge with a 5 mm seam allowance. Trim the corners and turn the blade right side out. With the seam in the middle, press flat into a pointed shape. Repeat with all the other petal blade fabric pieces.
Step 3 - Arrange the petals blades in desired layout.
Starting with two adjacent petals, with right sides facing, pin together along one of the side-angled edges of petals. Stitch with a 5 mm seam allowance.
Repeat method sewing all petals together to form a flower-shaped ring.
With wrong side facing up, press all seam allowances to the one direction going around the flower shape.
Step 4 - Fuse the 20 cm square of fusible fleece to the back of the 20 cm square of white heart cotton fabric.
With right sides facing up, place the flower shape in the centre of the padded white heart cotton fabric. Pin in place.
Topstitch the flower to the padded cotton piece around the outer edges and the inner circle opening, 3 mm in from the edges.
Step 5 - Fuse the 4 cm circle of interfacing to the back middle of the daisy centre fabric piece.
Hand sew a running stitch around the outer edge of daisy centre piece. Gather up the stitching, to form a neat gathered hem around the fused middle of the fabric. Tie off stitching and press the gathered hem to the back side of the daisy centre.
Turn over, with right side facing up, press flat. Pin to the middle of the petal flower, covering up the open inner circle of the flower petals. Top stitch in place 3 mm in from the edges.
Step 6 - Press under 3 cm along all four edges of the 26 cm square backing piece. Open back out, and press under 1.5 mm in from outer edges.
- See guide provided for sewing of mitered corners:
With right sides facing, fold backing fabric at one of the corners, aligning two adjacent outer edges. Press corner of fabric. Pin and stitch from the folded top edge at the 3 cm folded line mark down to the 1.5 cm folded line mark. Trim corner excess fabric, 5 mm away from the stitching. Repeat on other corners of fabric.
Press back along the 1.5 cm pressed line edges and then turn the corners out to the right way. This should give you 4 pressed mitered corners with the raw edges pressed under giving a neat edging around fabric.
Step 7 - Place the padded fabric, flower petal side up inside the backing mitered edged fabric piece. Ensure padded fabric is lined up, corner to corner, edge to edge and straight within the backing piece. Pin then stitch backing piece in place by topstitching 3 mm in from the inner pressed edges of edging fabric. Press flat.


