 | ||
| Your browser is not supported. | ||
|
Please browse our site using any of the following options:
| ||
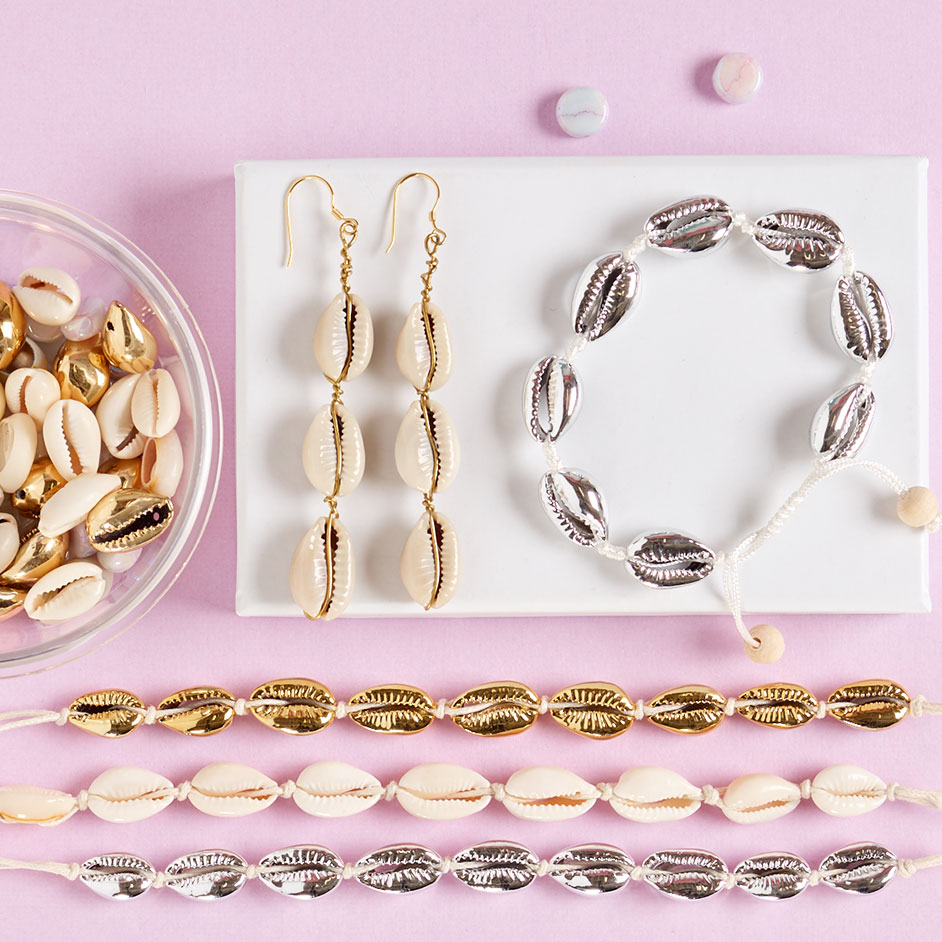
COWRIE SHELL EARRINGS & BRACELET

Level: Intermediate
WHAT YOU'LL NEED:
Bracelet
- Knotting cord, 70cm x 2 lengths
- 7 shells
- 10 small wood (4mm or 6mm) or other beads with medium size hole
- Large eye bead or sewing needle
- Scissors
- Lighter
- Bead Mat
- Safety Pin
Necklace
- 20-22-gauge wire
- 6 small shell beads
- 2 shepherd hooks
- Round Nose pliers
INSTRUCTIONS
Bracelet
Step 1 - Knot together two cord lengths at the very end holding both strands together and tie an overhand knot.
Step 2 - Add a round bead to both strands and push to the end where the first knot is tied. Tie a second overhand knot about 5cm
lower down on the strings. Pin or tape the string down to a bead or surface to keep it in place while the shells are added.
Step 3 - Add a round bead and then a shell by stringing each of the two strands through the shell going in opposite directions to
create an X in the centre of the shell. First, identify which of the two strings seems to be on the bottom. Thread the bottom string
up through the underside of the shell (cut side), then pull the slack through. Next, take the top string and thread it through the
same shell going downwards through the top side of the shell (ridged side) and pull the slack through. Push the shell up to touch
the bead above it, pulling any remaining slack on both strings.
Step 4 - Once the first shell is on, add another small round bead, tie an overhand knot.
Step 5 - Repeats steps 3 and 4 six more times.
Step 6 - Once all of the shells and round beads are on tie a final knot around 5cm below as per STEP 2. Cut the remaining
knotting cord below the knot. Use this knotting cord in the next step to create an adjustable square knot closure.
To create an adjustable square knot closure:
Step 7 - Before creating the first square knot prep the strings. First, take one of the scrap strings and cut it in half - set these
two small strings aside. Next, take the ends of the bracelet and lay one on top of the other going in opposite directions so that
both ends can be pulled to adjust. Use the two small strings to temporarily tie the adjustable ends in place (tie one at the top
and one at the bottom). This will keep all the strings in place for adding the square knot closure.
Step 8 - Take the other piece of scrap string, slide it under the adjustable strings and even out the scrap string so it's the same length on both sides.
Step 9 - To begin the first square knot, lay the left strand of the scrap string horizontally over the centre strings. Then place the right string on top of the horizontal string.
Step 10 - Next, feed the right string under the centre strings and pull it out through the loop that formed on the left side. Pull evenly on both the right and left strings to tighten. This is one half of the first square knot.
Step 11 - To complete the first square knot, repeat the steps above but this time on the opposite side: right string lays horizontally over centre strands. Left string then goes on top of the horizontal string, then under the centre strands, and finally out through the loop on the right. Pull evenly on both strands to tighten.
Step 12 - Repeat the square knot process, making sure to always alternate sides. Stop when there are 5-6 vertical notches on each side of the closure.
Step 13 - To neatly finish the adjustable closure use a large eye needle. Thread the needle with one or both ends of the remaining string, then go under the last two stitches of the knot with the needle, pulling all the way through and pulling tight. If doing one at a time repeat with the second string. Slightly loosen the last two stitches to make sure the needle is going under and
not through them.
Step 14 - Once both strands have been threaded into the last square knot and have been pulled tightly, add the last small bead and tie a couple of overhand knots to secure. Cut off the remaining string leaving about a half centimetre of length. Carefully melt the ends just cut using a lighter. This will keep the adjustable closure secure and prevent the cut ends from fraying.
Step 15 - Remove the temporary pins or tape and burn the knotted ends of the adjustable strands to finish.
Earrings
Step 1 - Place 3 shells end to end. Measure a length of wire according to these shells. Add another 1.5cm and then double this length.
Step 2 - Bend the wire in the centre.
Step 3 - Attach first shell by sliding the wire along the opening of the shell. Tuck it into the centre. Twist the wire at the end of the shell a couple of times with fingers or pliers to tighten.
Step 4 - Repeat STEP 3 two more times pushing the shell beads together to keep tight.
Step 5 - Trim one end of the two wires at the end.
Step 6 - Make a 90 degree angle with the remaining wire and turn a loop. Wrap any leftover wire to finish the loop and trim if necessary.
Step 7 - Add a shepherd hook to finish.
Step 8 - Complete all steps again to create second earring.


