 | ||
| Your browser is not supported. | ||
|
Please browse our site using any of the following options:
| ||
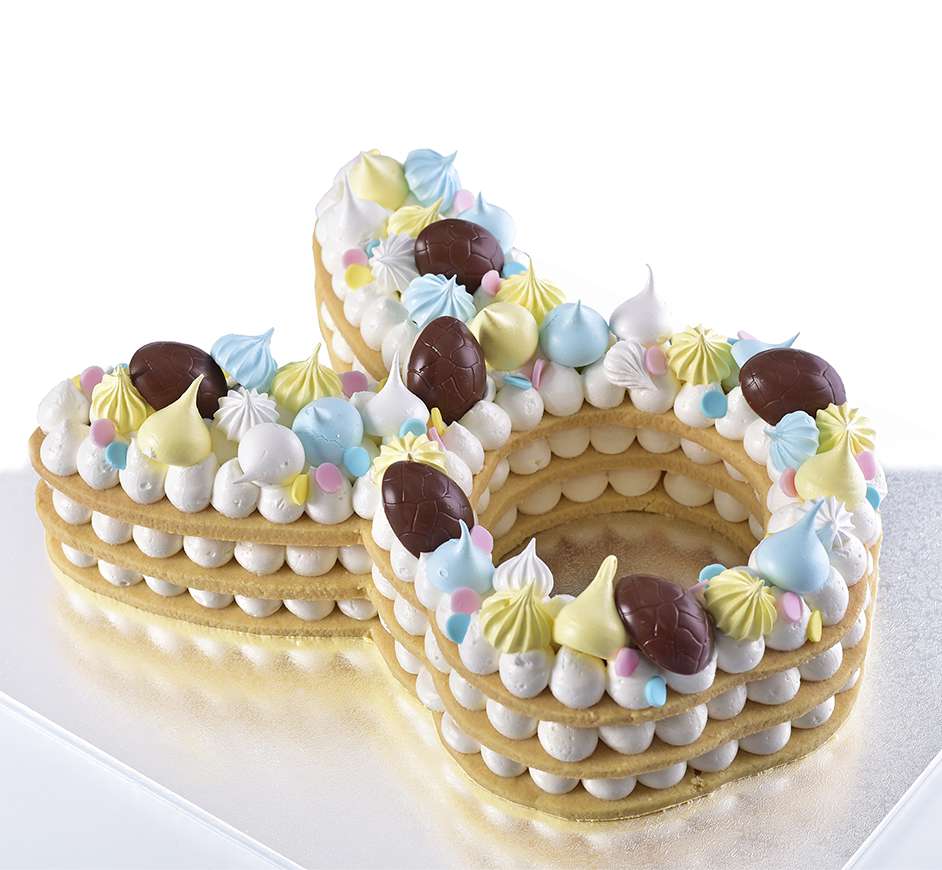
BUNNY BISCUIT CAKE

LEVEL: EASY
WHAT YOU'LL NEED
- 200g 'Robert's' Meringue Mix
- Food Colouring - Gel or Paste
- 100g Satin Ice Fondant - Three Different Colours
- 150g 'Robert's' Melting Buttons White, Milk or Dark - melted
- 100g 'Robert's' Fondant Creme - Strawberry
- 500g 'Robert's' No Spread Vanilla Biscuit Mix
- 400g 'Robert's' Silky Icing
- 100g 'Robert's' Bakers Jam - Optional
Materials
- 'Robert's' Piping Nozzles - 1.2cm Open Round & 14 Point Open Star
- Flat Baking Trays lined with Baking Paper
- 'Robert's' Flexi Mat
- Rolling Pin
- 'Robert's' Extra Small Easter Egg Mould #7
- 'Robert's' Sculpting Tool #3
- 'Robert's' Thickness Guides - Black
- Baking Paper Bunny Template - Approximate Size 29 x 18cm
- 'Robert's' Piping Bag - 18 Inch
INSTRUCTIONS
Mini Meringues - Refer to the packaging for detailed instructions of how to make and colour Meringues. Meringues can be made 2-3 days before and stored in an airtight container.
Colourful Confetti- Roll each colour fondant on the Flexi Mat to approximately 2-3mm thickness. Use the small end of the 1.2cm Open Round Nozzle to cut out the coloured Confetti. Place the Confetti onto a piece of baking paper to dry completely and harden. Confetti can be made 2-3 days before.
Strawberry Filled Easter Eggs - Fill each cavity of the mould with melted buttons. Tap the mould on the bench to remove any air bubbles. When the chocolate begins to set around the outside edge and forms a 2 - 3 mm shell, tip the mould upside down over a sheet of baking paper to remove excess chocolate. Clean around the edge of each shell using Sculpting Tool #3. Place the mould into the fridge for approximately 10 - 15 minutes to set. Pipe a small amount of Fondant Creme filling into each chocolate shell, filling two thirds full. Top with melted buttons and refrigerate until set. Remove the eggs from the mould, bring to room temperature then store in an airtight container. Chocolate eggs can be made 2-3 days before.
Biscuit Bunny - Refer to the back of the packet for detailed instructions of how to make the 500g biscuit dough recipe. Divide the dough into two pieces. Place a sheet of baking paper on top of the Flexi Mat. Place one piece of dough on top and cover with a second piece of baking paper. Use the Black Thickness Guides and a rolling pin to roll out the dough. Slide the dough onto a flat baking tray and refrigerate for 10 minutes. Remove the top sheet of baking paper and lay the bunny template on top. Cut around the outline, then remove the excess dough. Repeat this step until you have three bunny shaped biscuits. Bake for 20 - 25 minutes or until golden. Cool completely before decorating.
Silky Icing - Refer to the packaging for detailed instructions of how to make the Silky Icing. Prepare the 18" piping bag with the 1.2cm Open Round Nozzle. Fill the piping bag two thirds full with icing.
Decorate - Secure the first biscuit layer to a serving plate with 2 - 3 dots of icing. Pipe small dots of icing all over the bunny biscuit. Place the next biscuit layer on top. Repeat with dots of icing. Place into the fridge to firm the icing. Place the third biscuit layer on top then cover with dots of icing. Decorate with Meringues and Chocolate Eggs. Refrigerate decorated cake until just before serving. For best results add the Confetti close to the time of serving.
NOTES
Large biscuits can be fragile, handle with care when assembling this cake
If you like a little Ginger and Spice, why not try making this cake with 'Robert's' Gingerbread Mix.
Pipe dots of Bakers Jam between the silky icing dots for an extra delicious strawberry burst


