 | ||
| Your browser is not supported. | ||
|
Please browse our site using any of the following options:
| ||
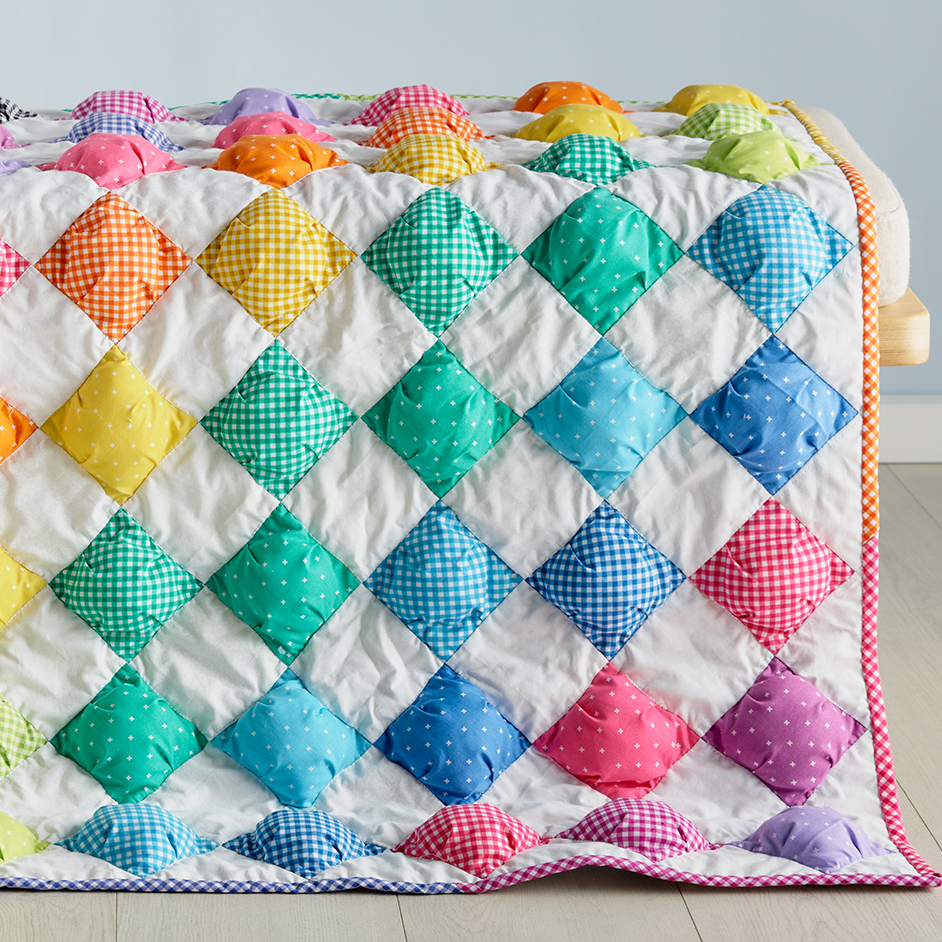
PRIMA BLENDER PUFF QUILT

Level: Easy
What you'll need:
- Prima blender fat flat bundle x my heart
- Prima blender flat fat bundle mini gingham
- 50cm white fabric
- 1m lining fabric
- 1m backing fabric
- Hobby fill x1 bag
- 1.2m cotton batting
- 100% matching Gutterman cotton thread
- Rotary cutter
- mat and quilters ruler
- Quilting pins
- Tape measure
- Scissors
- seam ripper
- Hand sewing needle
- Sewing machine foot and walking foot
All fabric should be 100% cotton, washed and pressed. 1/4" seam allowance is used throughout unless indicated.Please read all instructions carefully before commencing the quilt.
Finished Size - 39.5" x 29"
(this quilt can easily be made longer and wider by adding more rows of squares).
Terms
WOF - Width of Fabric
Pleat - Double the fabric on itself
Cutting Instructions
Lining fabric - Cut 5 x 4" strips across WOF. Crosscut to yield a total of 48 x 4" squares.
Assorted rainbow fabrics - Cut a total of 48 x 4.5" squares.
White fabric
Main squares - Cut 4 strips across WOF. Crosscut to yield a total of 35 x 4" squares for main quilt
Setting Triangles - Cut 1 x 7" strip across WOF. Crosscut to yield 6 x 7" squares. Cut each square across the diagonal both ways 4 triangles. (total of 24 triangles). See Diagram.
Corner Triangles - Cut 2 x 4.5" squares. Cut each square diagonally one way to yield 2 triangles. See Diagram.
Binding fabric - Using your rainbow fat quarters, cut 1 strip 2.5" wide from 11 of the fabrics.
INSTRUCTIONS
Making a puff square
All fabric should be 100% cotton, washed and pressed. 1/4" seam allowance is used throughout unless indicated.
Please read all instructions carefully before commencing the quilt.
Finished Size - 39.5" x 29"
(this quilt can easily be made longer and wider by adding more rows of squares)
Terms
WOF - Width of Fabric
Pleat - Double the fabric on itself
Step 1 - Lay one of the 4.5" rainbow fabrics right side up on top of a 4" lining square.
Step 2 - Pin fabrics together on one edge matching at the top and bottom noting that there is a large amount of rainbow square fabric in between the pins. Create a pleat along the 4.5" square edge so that the fabric is now flat against the lining square.
Step 3 - Sew a very scant 1/4" seam along the edge.
Step 4 - Repeat this process on two other edges joining the squares together. One side will remain open for now.
Repeat Steps 1-4 for all other rainbow and lining squares.
Step 5 - Grab a small handful of the hobby fill and stuff into each of the rainbow squares.
Step 6 - Follow step two closing the hole you used to stuff the hobby fill into. Repeat this step for all other rainbow squares.
Tip - Take care to not overfill your squares otherwise it will create a lot of bulk when you are sewing the squares together later.
Step 7 - Lay out your rainbow squares in a pleasing manner, placing a white square in between two rainbow squares.
Step 8 - Sew one white square to one rainbow puff square right sides together. Repeat this step until you have created your quilt rows quilt rows. (Refer diagram).
Step 9 - Sew your white corner squares to each side of the two end rows (consisting of 1 rainbow puff square). (Refer diagram).
Step 10 - Lay your rows out next to each other to ensure you are happy with the placement of the rainbow squares.
Step 11 - Sew one set in triangle to the end of each row (Refer diagram).
Step 12 - Sew your rows together.
Step 13- Lay the backing, batting and quilt top and baste together. Quilt as desired.
Step 14- Join binding strips, fold in half and iron. Sew binding around quilt.


