 | ||
| Your browser is not supported. | ||
|
Please browse our site using any of the following options:
| ||
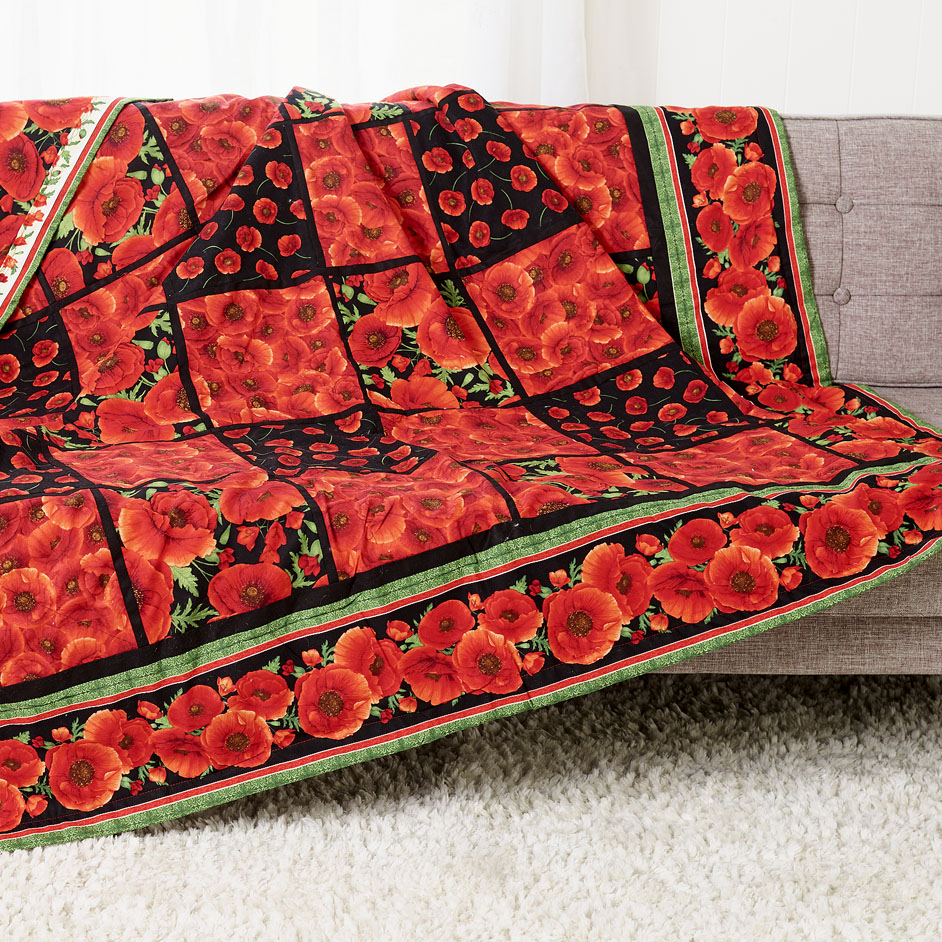
POPPIES QUILT

LEVEL: EASY
WHAT YOU'LL NEED:
- 2m (A) Striped poppies for border (pattern repeats for 4 matching stripes across WOF)
- 70cm (B) Small poppies with black background
- 70cm (C) Large poppies with green background
- 120cm (D) Full medium red poppies
- 80cm Black Prima
- 175x175cm backing
- 175x175cm wadding
- Black thread
- Basting Spray
QUILT MEASURES
175cm x 175cm
PROJECT SPECIFICATIONS
Sew with a 1cm seam allowance
INSTRUCTIONS
CUTTING
From fabric A, cut the length into four long stripes. Trim away the excess bulk of green on each stripe to ensure you have four symmetrical stripes with a slither of green along each edge. Stripes should be approximately 180cm x 20cm.
From fabric B and C cut nine squares 23cm x 23cm.
From fabric D cut 18 squares 23cm x 23cm.
From your Black Prima cut:
- Eight thick strips 100cm x 4cm (these thick strips will be the edge between your tiled poppy squares and outer border)
- Five thin strips 100cm x 3cm
- Five medium strips 50cm x 3cm
- Thirty short strips 23cm x 3cm
SEWING
Step 1.Along the short edge at a 45 degree angle, sew each of your five thin strips (100cm x 3cm) to a medium strip (50cm x 3cm) and press.
Step 2. Along the short edge at a 45 degree angle, sew your eight thick strips into pairs.
Step 3. Next we need to create two different row designs:
- Row 1 should be a repeat pattern of fabric C,D,C,D,C,D with a short stripe in between each square. Create three of these and press each.
- Row 2 should be a repeat pattern of fabric D,B,D,B,D,B with a short stripe in between each square. Create three of these and press each.
Step 4. Layout your rows, alternating patterns to ensure fabric D remains in a checkers tile pattern. Sew a long thin strip (created in step 1) in-between each row until you have all six rows sewn together.
Step 5. To create the border, sew each of your four thick strips (created in step 2) along each of your four stripes cut from fabric A, your finished stripe should be 23cm x 2m.
Step 6. Start by sewing the top and bottom borders on (with the Black Prima to the inside), centring the middle of your border to the middle of your patchwork (this should mean you have approx. 30cm overhang each end).
Step 7. To attach the right side border, lay your border stripe (right side down) along the top border, making sure you align the Black Prima. At a 45 degrees angle from the corner of your patchwork, sew the two borders together, stopping with your needle down at the corner of your patchwork.
Step 8. Lift your foot and turn the remaining length of your right side border stripe to align with the edge of your patchwork and continue sewing. When you get to the bottom corner of your patchwork, pause again with your needle down and turn your border to match the bottom border, before sewing at 45 degrees angle to finish the corner.
Step 9. Repeat steps 7 and 8 for the left side border.
Step 10. To finish your quilt, baste your backing fabric onto your wadding, turn over and baste your patchwork front centred to your wadding (the front should overhang a few centimetres each edge. Quilt your three layers together.
Step 11. Fold over your excess front fabric to the back and fold again for a neat edge before you sew down your new edge. Tuck in your edge corners and sew down for a neat finish, and press when complete.


