 | ||
| Your browser is not supported. | ||
|
Please browse our site using any of the following options:
| ||
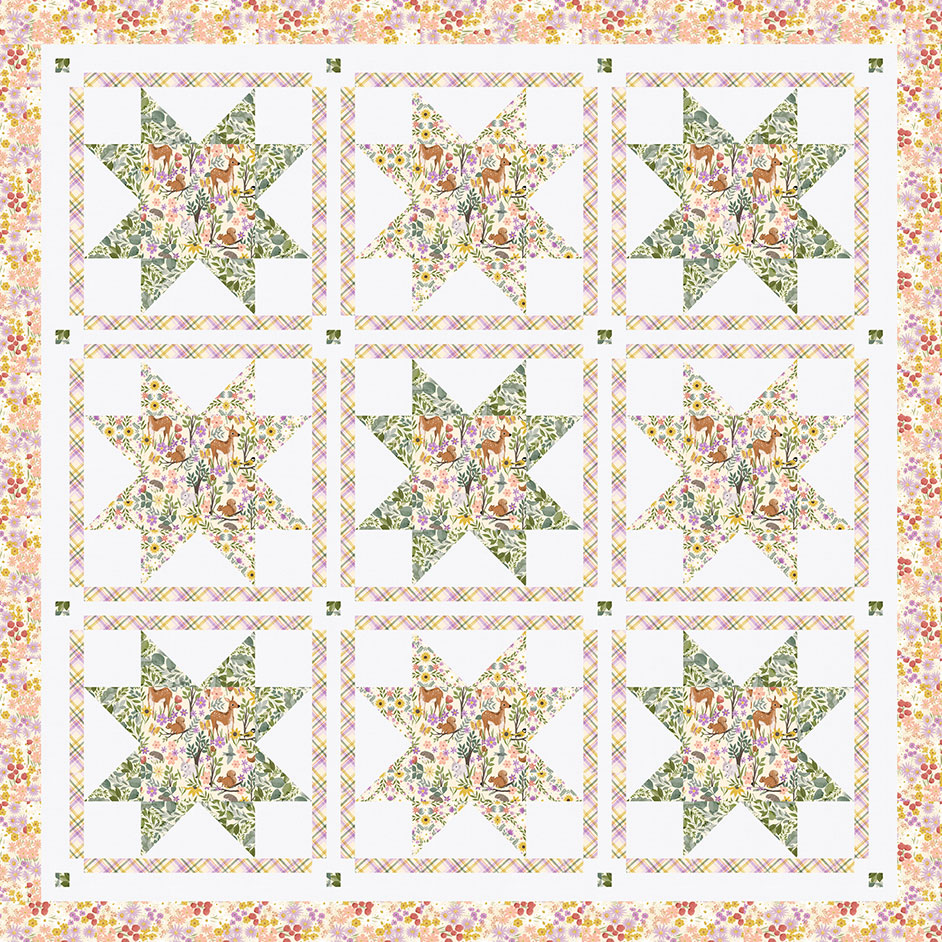
DAISY WOODS QUILT

LEVEL: EASY
WHAT YOU'LL NEED:
- 3/4 yard Daisy Woods CRM, 112cm (A)
- 1/2 yard Daisy Woods Leaves, 112cm (B)
- 1/3 yard Daisy Woods Damask, 112cm (C)
- 2 yards Solid Background Fabric, 112cm (D)
- 2/3 yards Daisy Woods Plaid, 112cm (E)
- 1 yard Daisy Woods Packed Floral, 112cm (F)
- 1/2 yard Daisy Woods Leaves, 112cm (Binding)
- 4-1/4 yards for backing
Notes: Read through all the instructions before beginning. All of the seam allowances are 1/4" unless otherwise noted. Press seam allowances open unless otherwise noted. Width of fabric (WOF) is equal to at least 42" wide. Right sides together has been abbreviated to RST. Remember to measure twice and cut once!
INSTRUCTIONS
CUTTING INSTRUCTIONS
From Fabric A, cut: Three 8-1/2" x WOF strips. Subcut: nine 8-1/2" squares
From Fabric B, cut: Three 5" x WOF strips.
Subcut: twenty 5" squares for the HSTsone 1-1/2" x WOF strip. Subcut: sixteen 1-1/2" squares for the cornerstones
From Fabric C, cut: Two 5" x WOF strips.
Subcut: sixteen 5" squares for the HSTs
From Fabric D, cut: Five 5" x WOF strips.
Subcut: thirty-six 5" squares for the HSTs four 4-1/2" x WOF strips.
Subcut: thirty-six 4-1/2" squares sixteen 1-1/2" x WOF strips.
Subcut: twenty-four 1-1/2" x 16-1/2" strips for the sashing units sixteen 1-1/2" x 3-1/2" rectangles for the cornerstones four 1-1/2" x 2-1/2" rectangles for the cornerstones twenty-eight 1-1/2" squares for the cornerstones
Sew the remaining six strips together, end-to-end, then trim: two 1-1/2" x 58-1/2" side inner borders, two 1-1/2" x 60-1/2" top/bottom inner borders
From Fabric E, cut: fifteen 1-1/2" x WOF strips. Sew together, end-to-end, then trim: thirty-six 1-1/2" x 16-1/2" strips for the sashing
From Fabric F, cut: Seven 4-1/2" x WOF strips.
Sew together, end-to-end, then trim: two 4-1/2" x 60-1/2" side outer borders, two 4-1/2" x 68-1/2" top/bottom outer borders
From the Binding Fabric, cut: seven 2-1/2" x WOF strips
Step 1: Pair a 5" Fabric D square with a 5" Fabric B square, RST. Mark a diagonal line on the wrong side of one square. Sew 1/4" away from both sides of the marked line. Cut on the marked line, creating two half-square triangles (HSTs). Press toward the darker fabric. Trim to 4-1/2" square. Repeat to make forty D/B HSTs.
Step 2: Repeat Step 1 to make thirty-two C/D HSTs.
Step 3: Gather:
One 8-1/2" Fabric A square
four 4-1/2" Fabric D squares
eight D/B HSTs
Arrange the units as shown. Sew the HSTs together to form pairs. Press.
Step 4: Arrange the units into three rows of three. Note the fabric placement and block orientation in the Block Assembly Diagram. Sew the units together to form the rows. Press the seams away from the HST pairs.
Step 5: Sew the rows together, nesting the seams and pressing the seams to one side to form the block. The resulting Block should measure 16-1/2" square. Repeat to make five Blocks with B/D HSTs and four Blocks with C/D HSTs.
Step 6: Gather:
two 16-1/2" Fabric E strips
one 16-1/2" Fabric D strip
Arrange the units as shown. Sew together along the longest edges. Press. Repeat to make twelve sashing units like this.
Step 7: Gather:
one 16-1/2" Fabric E strip
one 16-1/2" Fabric D strip
Arrange the units as shown. Sew together along the longest edges. Press. Repeat to make twelve sashing units like this.
Step 8: Gather:
one 1-1/2" x 2-1/2" Fabric D rectangle
one 1-1/2" Fabric D square
one 1-1/2" Fabric B square
Arrange the units as shown, and sew together to form the outermost cornerstone units. Press. Repeat to make four 2-1/2" square units like this.
Step 9: Gather:
one 1-1/2" x 3-1/2" Fabric D rectangle
two 1-1/2" Fabric D squares
one 1-1/2" Fabric B square
Arrange the units as shown, and sew together to form the outer edge cornerstone units. Press. Repeat to make eight 2-1/2" x 3-1/2" units like this.
Step 10: Gather:
two 1-1/2" x 3-1/2" Fabric D rectangles
two 1-1/2" Fabric D squares
one 1-1/2" Fabric B square
Arrange the units as shown, and sew together to form the cornerstone units for the middle of the quilt. Press. Repeat to make four 3-1/2" square units like this.
Step 11: Arrange the Blocks together as indicated in the Quilt Assembly Diagram. Sew each row together, using Step 6 sashing units between each block and Step 7 sashing units at the beginning and end of each row. Press seams toward the sashing. Repeat to make three block rows.
Step 12: Gather two Step 8 cornerstone units, two Step 9 cornerstone units and three Step 7 sashing units. Sew each row together, using cornerstones between each sashing strip and at the beginning and end of each row. Press seams toward the sashing. Repeat to make two sashing rows like this.
Step 13: Gather two Step 9 cornerstone units, two Step 10 cornerstone units and three Step 6 sashing units. Sew each row together, using cornerstones between each sashing strip and at the beginning and end of each row. Press seams toward the sashing. Repeat to make two sashing rows like this.
Step 14: Sew the sashing and block rows together, pinning and nesting the seams. Press seams open or to the sashing.
Step 15: Sew the side inner borders to the sides of the quilt center. Press toward the borders. Sew the top and bottom inner borders to the quilt center. Press toward the borders.
Step 16: Sew the side outer borders to the sides of the quilt center. Press toward the borders. Sew the top and bottom outer borders to the quilt center. Press toward the borders.
Your quilt top is complete! Baste, quilt, bind and enjoy!


