 | ||
| Your browser is not supported. | ||
|
Please browse our site using any of the following options:
| ||
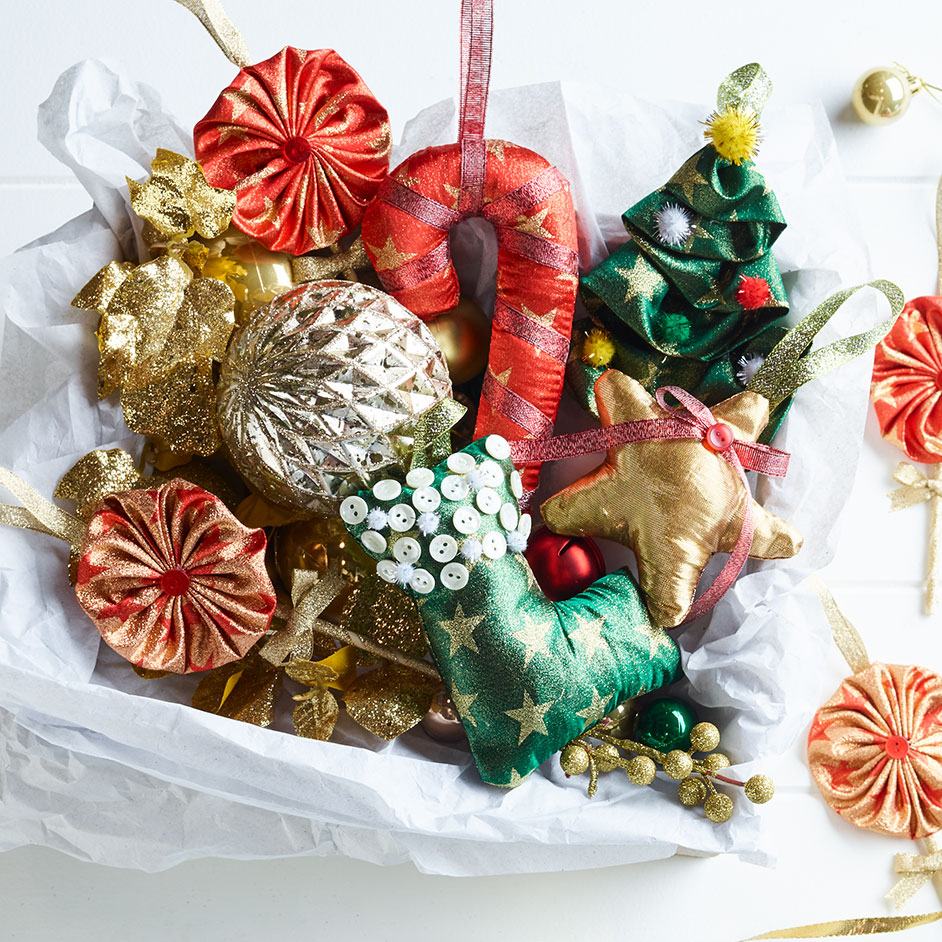
CHRISTMAS METALLICS DECORATIONS

Level: Easy
GATHERED CHRISTMAS TREE ORNAMENT
WHAT YOU'LL NEED
- Fabric (10cm by entire width of fabric per tree)
- Dowel Stick (Arbee)
- Ribbon (15cm Per tree)
- GLITTER POMPOMS!
- Needle and thread
- Hot glue and sticks
INSTRUCTIONS
Step 1 - If you haven't already; cut your 10cm strip off the main fabric, or a bunch if you're making more than one.
Step 2 - Fold the strip in half along the length with the right sides out.
Step 3 - With a needle and thread, sew a running stitch along the raw edge.
Step 4 - Gently gather the strip by at least half and secure the thread at the other end.
Step 5 - Hot glue a 10cm ribbon loop to the top of the dowel.
Step 6 - Glue a small piece of ribbon around the bottom of the dowel.
Step 7 - Starting at the bottom, glue the gathering to the stick in a decreasing zig-zag pattern to mimic the classic tree shape with the folded edge down and the raw edge up and being covered by the next layer.
Step 8 - Tuck and glue both ends to neaten.
Step 9 - Decorate with glitter pompoms.
HOBBY FILL ORNAMENTS
WHAT YOU'LL NEED
- Fabric
- Ribbon
- Pompoms
- Toy fill stuffing
- Decorative Buttons
- Hot glue gun and sticks
- Needle and thread
- Optional sewing machine
INSTRUCTIONS
Step 1 - Draw or search and print some basic Christmas shapes
Step 2 - Trace onto fabric and cut two of each shape including a 6mm (1/4") seam allowance, mirrored.
Step 3 - Either machine stitch or hand backstitch around the entire shape.
Step 4 - Glue and (safely) smear hot glue in a line on the back of the shape, wait for it to cool completely and cut a slash in the centre of the glue line (this will stop the fabric fraying)
Step 5 - Clip any excess fabric from corners, into angles and curves.
Step 6 - Turn inside out and stuff with toy fill.
Step 7 - With needle and thread, hand sew the slash shut and glue a strengthening piece of ribbon over the top.
Step 8 - Glue another piece of ribbon to the top at the back as a hanger.
Step 9 - Decorate with more ribbon, pompoms and buttons.
YOYO LOLLIPOP ORNAMENTS
WHAT YOU'LL NEED
- Fabric (20cm per lollipop)
- Dowel Sticks (Arbee)
- Buttons, 1 per lollipop
- Ribbon, 60cm per lollipop
- Hot glue gun and sticks
- Needle and thread
INSTRUCTIONS
Step 1 - Glue ribbon to the top of the stick at a 45 degree downward angle, twist down the stick and glue to secure the bottom. Snip off the excess ribbon.
Step 2 - Glue a 10cm loop of ribbon to the stick to be the hanger.
Step 3 - Glue small pieces of ribbon around the top and bottom to neaten.
Step 4 - Trace a round shape like a bread plate onto the wrong side of the fabric. Whatever size trace, the finished size will be approximately half the size.
Step 5 - With the wrong side facing you, sew a running stitch around the outside of the circle.
Step 6 - Once all the way around and back where you started, gently pull the running stitch tight and flatten into a smaller disc, re-arranging fabric to be even and flat.
Step 7 - Sew some strengthening stiches to hold it together, sew some small securing stitches and cut the thread.
Step 8 - Glue the yoyo to the stick so the edge just covers the top of the stick.
Step 9 - Glue a button over the centre.
Step 10 - Tie a small bow with any left-over ribbon and glue about a finger width below the bottom edge of the yoyo.
Step 11 - Hang and admire


