 | ||
| Your browser is not supported. | ||
|
Please browse our site using any of the following options:
| ||
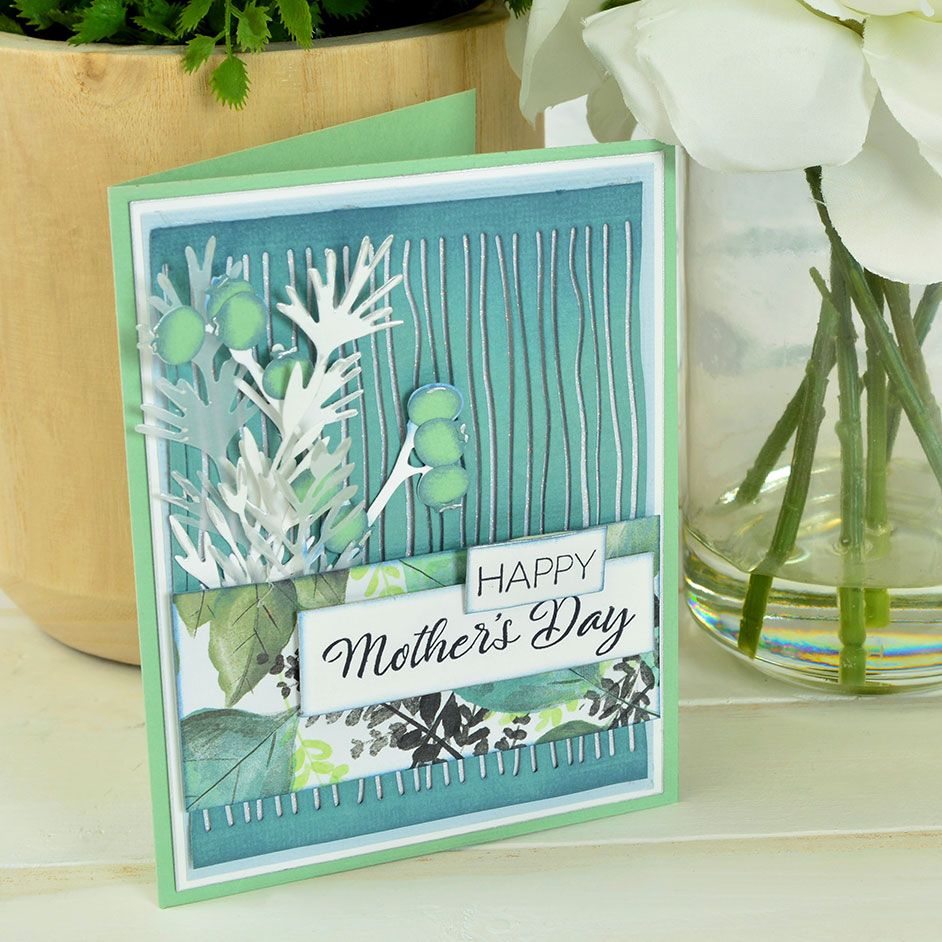
MOTHER'S DAY CARD

Level: Easy
WHAT YOU'LL NEED
- Sizzix® Big Shot® Machine (660200) or Sizzix® Big Shot® Plus Machine (660020) or Sizzix® Big Shot® Express Machine (660850) or Sizzix® Big Shot® Foldaway Machine (662220)
- Sizzix® Thinlits® Die Set 5PK - Natural Leaves (80504516/664361)
- Sizzix® Thinlits® Die Set 4PK - Wild Thing (80504490/664384)
- Sizzix Accessory - Multi-Tool (80451772/662875)
- Sizzix Accessory - Cardstock Sheets, 80PK (20 Colours) (80451721/663007)
- Foam Tape
- Permanent Adhesive Roller
- Ink Blending Tool with Sponge
- Cardstock (White, White Glitter)
- Patterned Paper
- Ink Pad (Navy)
- Liquid Adhesive
- Paint Pen (Silver Metallic)
- Paper Trimmer
- Printed Sentiment
- Vellum
INSTRUCTIONS
Step 1 - Cut a 5 1/2" x 8 1/2" panel of green cardstock. Fold in half to create card base. Cut a 4" x 5 1/4" panel of white cardstock. Center and adhere the white panel to the front of the card base with double-sided adhesive. Cut a 3 7/8" x 5 1/8" panel of light blue cardstock. Center and adhere the light blue panel to the white panel with doublesided adhesive. Cut a 3 6/8" x 5" panel of dark aqua and white glitter cardstock. Cut a 1 3/4"x 5" strip of patterned paper.
Step 2 - Die-cut a repeat pattern vertically across the entirety of the dark aqua panel using the stripe pattern from the Wild Things die set. Die-cut out of vellum one foliage branch, out of white cardstock one berry branch and one foliage branch and out of dark aqua cardstock three sets of berries from the Natural Leaves die set.
Step 3 - Apply navy ink along the edges of the patterned strip, dark aqua panel and dark aqua berries with the Blending Tool Head.
Step 4 - Line the edges of the dark aqua berries, vellum and white foliage branches with a silver metallic paint pen.
Step 5 - Print or stamp a desired sentiment onto white cardstock. Trim the sentiment down and apply navy ink to the edges with the Blending Tool Head.
Step 6 - Adhere the striped dark aqua panel to the top of the white glitter panel with liquid adhesive. Center and adhere the combined panel to the top of the light blue panel with double-sided adhesive.
Step 7 - Adhere the dark aqua berries to the white branches with liquid adhesive. Arrange the foliage and berry branches as desired along the left-hand side of the striped panel. Adhere the elements in place as desired with liquid adhesive.
Step 8 - Adhere the patterned strip to the bottom half of the striped die cut panel with foam tape. Adhere the sentiment on top of the patterned strip with foam tape.


