 | ||
| Your browser is not supported. | ||
|
Please browse our site using any of the following options:
| ||
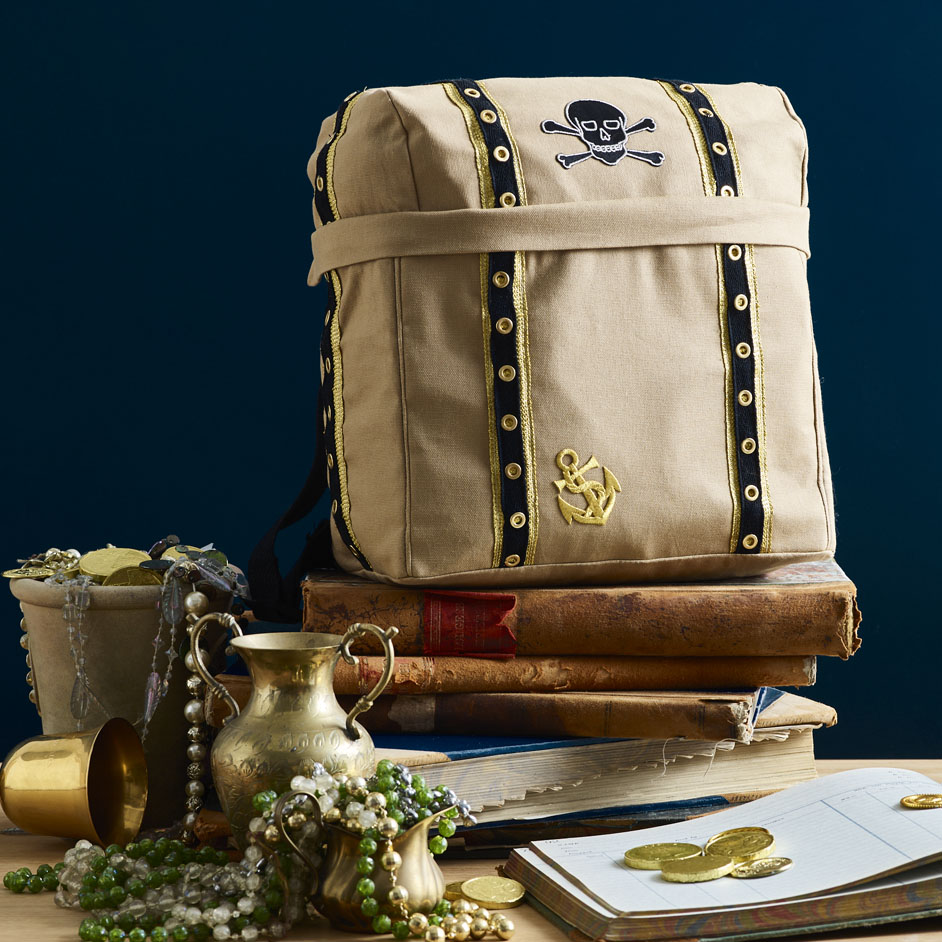
TREASURE CHEST BACKPACK

LEVEL: INTERMEDIATE
WHAT YOU'LL NEED:
- Plain fabric
- Decorative trims
- Pirate themed iron on motifs
- Long zip
- Interfacing
- Black braid
- Adjustable buckle black
INSTRUCTIONS
Step 1 - Start by cutting out your fabrics. The below needs to be cut out of the main fabric, lining and interfacing. All measurements include seam allowance.Base = 1 x 32cm by 17cm rectangle
Front and Back = 2 x 32cm by 22cm rectangle
Sides = 2 x 17cm by 22cm rectangle
Lid = 1 x 32cm by 32cm squareLid Sides = 2 x semi-circle 17cm diameter and 12cm radius
Zip Flap6 = 1 x 8cm by 62cm long rectangle
Step 2 - Once you have cut out all your pieces attach interfacing to the wrong side of main fabric by sewing panels together with a 0.5cm seam allowance.
Step 3 - To create gold trim for bag, centre the black eyelet trim on the gold braid and sew in place along the edges.
Step 4 - Once your trim is made you can measure and cut where it will be being used on the bag. We used it along the front and sides of the bag.
Base Front and Sides = 22cm x 4
Lid Front = 32cm x2
Lid Sides = 12cm x 2
Once all trim pieces are cut, pin the trims on the correct bag panels and sew in place along gold trim edges. Repeat this for every panel.
Step 5 - You can now start to assemble your bag. Pin and sew the front and sides of the base of bag together with a 1cm seam allowance.
Step 6 Now pin and sew the lid pieces together to create the semi-circle shape. Leave a 1cm seam allowance and step sewing about 2 cm from one end, this will help make putting the zip in easier.
Step 7 - Insert your zip along the front edge of the lid and the front and side panels of the base.
Step 8 - Prepare your shoulder straps by cutting 2 x 35cm of the black braiding.Turn over one end of the braid strips and top stitch down to finish neatly. Repeat this process for 2 more straps measuring 25cm long each, these will be used later. Pin the longer straps to the back panel at the top ensuring they are spaced evenly across the back seam - sew in place with a 0.5cm seam allowance. This will be sandwiched between the seam of the lid and back panel.
Step 9 - Now you can attach the lid of the bag to the base at the back seam. Pin the lid and back with right sides together along back edge and sew with a 1cm seam allowance. Now pin along the entire back corner seams and sew from the lid to the base of the bag, trapping the ends of the zip in the 1cm seam allowance. Repeat this on the other corner - you should now have the complete walls and lid of your bag.
Step 10 - Take your smaller 25cm straps and pin along bottom edge of the back panel at the base, ensuring the line up with the straps at the top of the back panel. Stitch in place with a 0.5cm seam allowance.
Step 11 - To enclose your bag shell pin and sew the base to the existing walls of the bag, sew around with a 1cm seam allowance.
Step 12 - Use an iron to attach pirate motifs and thread through strap buckle according to the instructions from the packaging. The shell of your bag is now finished.
Step 13 - For the lining sew all the base and lid panels together and then pin and sew together at the back seam. Then carefully pin and top stitch the lining to the zip openings to fully line the bag.
Step 14 For the zip flap iron the 60cm piece in half-length ways with right sides together and bag out the corners by sewing along the seam allowance then cutting the excess off at a point in the corner. Turn right side out and press. Now pin along the lid of the sides and front of bag, lining up the neat ends to sit flush to the back corner seams. Sew the flap in place and then top stitch along the right side of flap to hide the raw edge underneath.


