 | ||
| Your browser is not supported. | ||
|
Please browse our site using any of the following options:
| ||
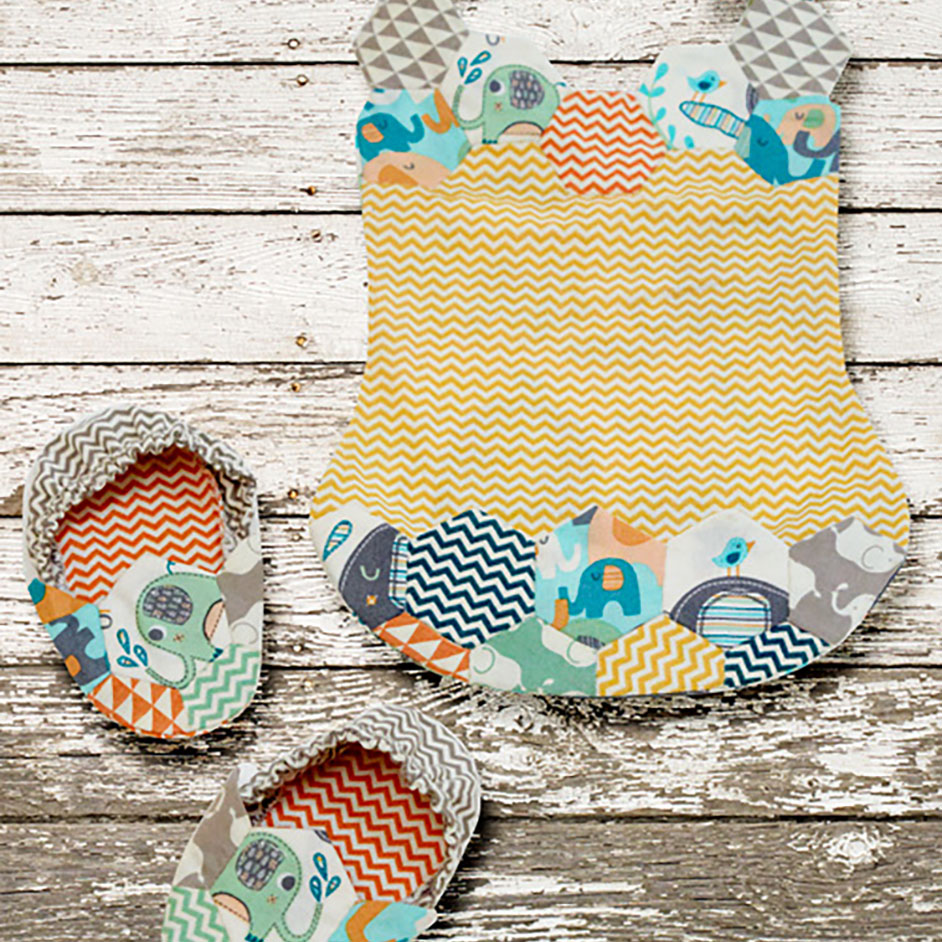
HEXAGON BIB & BOOTIES

WHAT YOU'LL NEED
- Sew Easy Paper Pieces - 1 inch hexagons
- Fabrics - minimum 7 different colours (Elephant Splash and simple ranges)
- 2 x 16cm lengths Soft Stretch elastic
- Fusible web
- Iron
- Sew-on Velcro Dot - white
- Matching G�termann 100% cotton thread
- Rotary cutter, mat & quilters rulers
- Quilting pins, tape measure
- Scissors, seam ripper
- Hand needle
- Tape
- Sewing machine with 1/4 inch foot and walking foot
INSTRUCTIONS
HEXAGONS
Create 22 x 1" hexagons for the bib and 10 x 1" hexagons for the slippers.
Step 1. Place your 1" hexagon paper piece onto the wrong side of the fabric and cut around the shape with a minimum 1/4" added to each side.
Step 2. To bulk cut your blender shapes cut fabric into 3" squares and stack on top of each other. Use a fabric marker to draw a hexagon 1/2" larger than your paper piece on each side for folding and to allow for slight fabric movement. Cut with a good quality pair of dressmaking shears as this will allow you to cut up to 7 layers of fabric at once.
Step 3. Temporarily adhere the paper piece to the wrong side of one of your prepared fabrics. You can do this with a pin or a fabric glue stick.
Step 4. Fold one edge of the fabric over the paper piece and secure. Fold the next edge creating a sharp point and continue until all fabric has been folded. Baste the edges down whilst avoiding the paper (this is so you do not have to remove the basting stitch at the end).
Step 5. Repeat this process with your remaining hexagon pieces until you have 32 required for the set. Finger press or iron the folds of each piece.
Step 6. Layout the hexagons as pictured for each item, play with the colour combos until you are happy with how it looks. To sew the pieces together, place with right sides together and whip stitch just through the fabric edges (not the paper) with a minimum of 12 stitches per inch. This is to ensure the stitches will not be seen once flipped. Repeat until all your hexagons are sewn together.
Tip You may notice some angles appear to be hard to sew - simply fold the adjacent paper pieces in half to allow the pieces you are sewing to lie flat against each other.
BIB
Step 1. Cut out all your pattern pieces.
Step 2. Iron on the double sided fusible to the neckline of the back panel and another piece to the back of your crumb catcher. Remove the paper pieces from the crumb catcher and iron the catcher lining in place. Stitch to secure the edges being careful to only stitch through the overlap of your hexagon pieces.
Step 3. Tape 5 of the paper pieces together to form the same shape as the base of the neckline. Attach 1/2" down from the top of the front panel. Snip into the corners and fold the edges down as in steps 1 to 3 of creating the hexagon pieces. Whip stitch to the neck piece. Remove all paper pieces.
Step 4. Place the front and back panel with right sides together and the crumb catcher sandwiched between. Sew with a scant 1/4" seam allowance up to the 1st hexagon of the neckline. Turn right way out, iron the rest of the back panel down and stitch the edges to secure.
Step 5. Attach your Velcro dot to the centre of the 2 top most hexagons - one on the front, and one on the back for fastening.
BOOTIES
Step 1. Cut out your pattern pieces.
Step 2. Attach the lining of the upper panel using fusible web and stitch to secure the edges, ensuring you only catch the overlap of the hexagons.
Step 3. Sew the heel pieces with right sides together along the top rounded edge only. Turn right side out and press seams. Sew a straight line 1/2" away from the edge on the right side of the fabric. Feed through the elastic and stitch each end down.
Step 4. Place the sole pieces with wrong sides together. Pin the right side of the upper and heel to the base. Stitch the edges with a blanket stitch. Turn right side out and press seams.


