 | ||
| Your browser is not supported. | ||
|
Please browse our site using any of the following options:
| ||
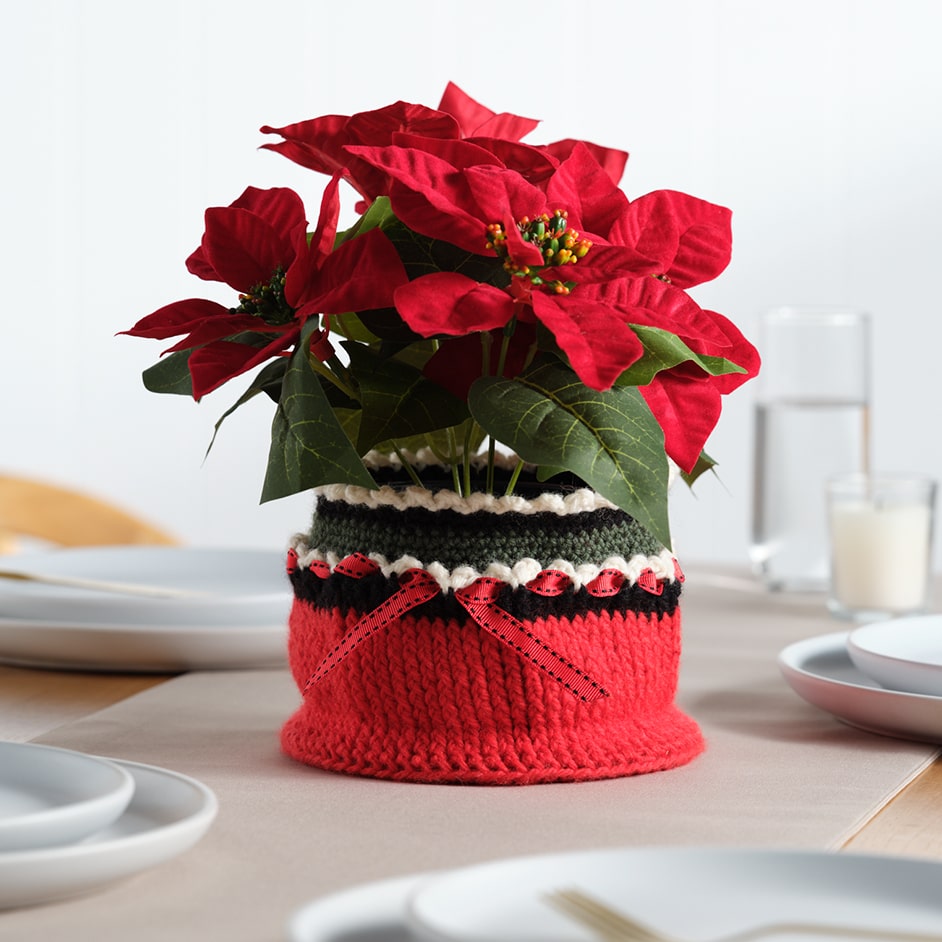
PURE WOOL POT PLANT HOLDER

Level: Intermediate
What you'll need:
- 4 Seasons Pure Wool 8 Ply 50 g balls:
- Main Col. (MC) Ruby x 2
- Col. 1 (C1) Bottle Green x 2
- Col. 2 (C2) Black x 1
- Col. 3 (C3) White x 1
- 4 mm Crochet Hook
- Scissors
- Yarn needle
- Plastic template sheet or cardboard for base
Special Abbreviations
htr - half treble
fphtr - front post half treble (working htr around the post of the st below)
Picot Edging - (ch3, 1dc in 1st ch, sk 1st, sls in next st) repeat
Instructions
Base
Start with a Magic Ring (slip knot but do not tighten).
1st Rnd - 2ch (counts as 1 htr), 11htr in magic ring loop, tighten loop, slst in 2nd ch at beg (12 htr).
2nd Rnd - 2ch, 1htr in same st as slst, (1 htr in next st, 2 htr in next st) 5 times, slst in 2nd st at beg (18 htr).
3rd Rnd - 2ch, 1htr in same st as slst, (1 htr in next 2sts, 2 htr in next st) 5 times, slst in 2nd ch at beg (24 htr).
4th Rnd - 2ch, 1htr in same st as slst, (1 htr in next 3 sts, 2 htr in next st) 5 times, slst in 2nd ch at beg (30 htr).
5th Rnd - 2ch 1htr in same st as slst, (1 htr in next 4 sts, 2 htr in next st) 5 times, slst in 2nd ch at beg (36 htr).
6th Rnd - 2ch 1htr in same st as slst, (1 htr in next 5 sts, 2 htr in next st) 5 times, slst in 2nd ch at beg (42 htr).
7th Rnd - 11th Rnd: continue in this manner working 1 htr more between increases (72 htr).
Note: Before continuing, block base by gently hover your steam iron over the base and pressing it flat using a towel.
Lower Body
12th Rnd - 2ch (counts as htr), 1htr in each st, working through back loops only, front post slst around 2ch at beg of the rnd (72 htr).
13th Rnd - 2ch, 1fphtr in each st, slst around 2ch at beg.
14th Rnd - 23rd Rnd - as 13th rnd, fasten off.
Next Rnd - attach C2: as 13th rnd.
Next Rnd - as 13th rnd, fasten off.
Picot Edging - attach C3: (see above Special Stitch Abbreviations), fasten off.
Pockets & Upper Body
Turn bowl inside out and hold with base facing up.
1st Rnd - attach C1 to 4th welt from base: 2ch, htr into each st of welt, slst in 2nd ch at beg (72 htr).
Work another 6 rnds of htrs, DO NOT work slst at end of last rnd.
Next 4 Rnds: 1dc in 2ch at beg of last rnd, continue working 1dc in each st continuously to end of rd, change to C2 in last dc.
Next 2 Rnds: 1dc in each st, change to C3 in last dc.
Picot Edging, fasten off.
Finishing
Sew in all ends.
Using MC, thread a length of yarn and back stitch through both layers of lower body and inside pocket lining to create dividers as desired.
Cut a circle of template plastic or cardboard in the measurement of the base and insert into base of bowl.


