 | ||
| Your browser is not supported. | ||
|
Please browse our site using any of the following options:
| ||
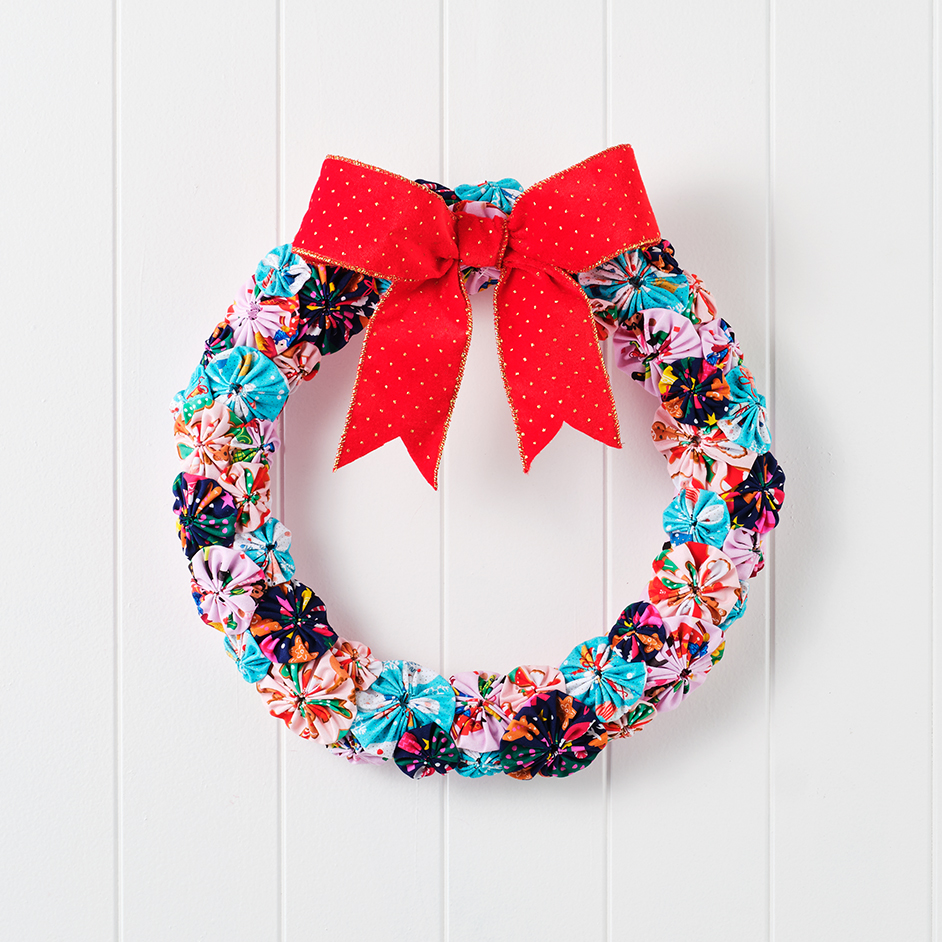
CHRISTMAS YOYO WREATH

Level: Beginner
What you'll need:
- 0.3 m Christmas print fabric in 4 prints (yoyos)
- 0.2 m Christmas print fabric/plain colour fabric (under fabric- to wrap wreath)
- Decofoam Wreath 350 mm
- Dressmaking Pins
- Gutermann Cotton Sewing thread
- Scissors
- Iron
- Tape measure/ruler
- Hand needle
- Washable fabric pencil/marker
- Optional: PVA Glue, ribbon for hanger
Instructions
- From the under Christmas print fabric, cut two strips, 8 cm wide by the total width of the fabric. Trim off selvedge edges. Press fabric strips.
- Starting from the back of the foam wreath, with the fabric right way up, pin one end of a fabric strips to the foam wreath on a slight angle. To fully secure the fabric, ensure that the pins are pushed in on an angle in opposite directions to anchor in place.
- Continue to wrap the fabric strip around the wreath tightly with the side edges of the fabric slightly overlapping. When the fabric strip runs out, secure the end as per the beginning of the strip and continue with another strip until the foam wreath is completely covered. Secure end of the strip as per before.
Optional: The ends of pins can be dipped in water-based PVA glue before inserting into the wreath to further secure the fabric. Do not use a glue that is not water-based, as it will melt the foam wreath. - From each of the 4 Christmas print fabrics, cut:
- 2 x 15 cm circles
- 4 x 13 cm circles
- 5 x 10 cm circles
- 4 x 9 cm circles - How to make fabric Yoyos:
- Press fabric circles to remove any creases.
- Thread a hand needle with thread. Knot thread at the end.
- With the wrong side of the fabric circle facing you, fold over the top edge towards you by about 5 mm. Sew a small stitch, into the folded over edge close to the top fold, pulling the thread back through tightly to secure knot.
- Continue to sew a long running stitch (approx. 1cm in length) around the fabric circle, folding over the edge as you go.
Tip: the longer the running stitch, the less gathers in the yoyo resulting in a smaller center hole. Shorter running stitches create more gathers which result in a larger center hole.
- Once you are back to the initial small stitch, take your last running stitch with the thread coming back out to where that small stitch ended- not the knot side.
- Pull the thread gently but tightly to gather up fabric to create the yoyo shape ensuring the gathers and the opening is in the center of the shape.
- To secure the ends of the thread, insert the needle and thread through a couple of the gathers, ensuring the thread is hidden and then tie the thread in a secure knot.
- Repeat the method to make up the rest of the yoyos from cut fabric circles. - Lay fabric-covered wreath, right side up on a flat surface. Arrange fabric yoyos on top of wreath, layering the different sizes as per desired layout.
- Once happy with the layout, beginning with the underneath yoyos, pin yoyos one at a time to foam the wreath with pins at different & opposite angles to secure and anchor to the wreath.
Optional: As per suggested before, the ends of pins can be dipped in water-based PVA glue before insert into the wreath to further secure fabric. Do not use a glue that is not water-based, as it will melt the foam wreath. - Optional: If wreath is to hang, a ribbon or fabric strip can be attached to the top back of the wreath with pins, or simply just with a loop and tie around the top of the wreath.


