 | ||
| Your browser is not supported. | ||
|
Please browse our site using any of the following options:
| ||
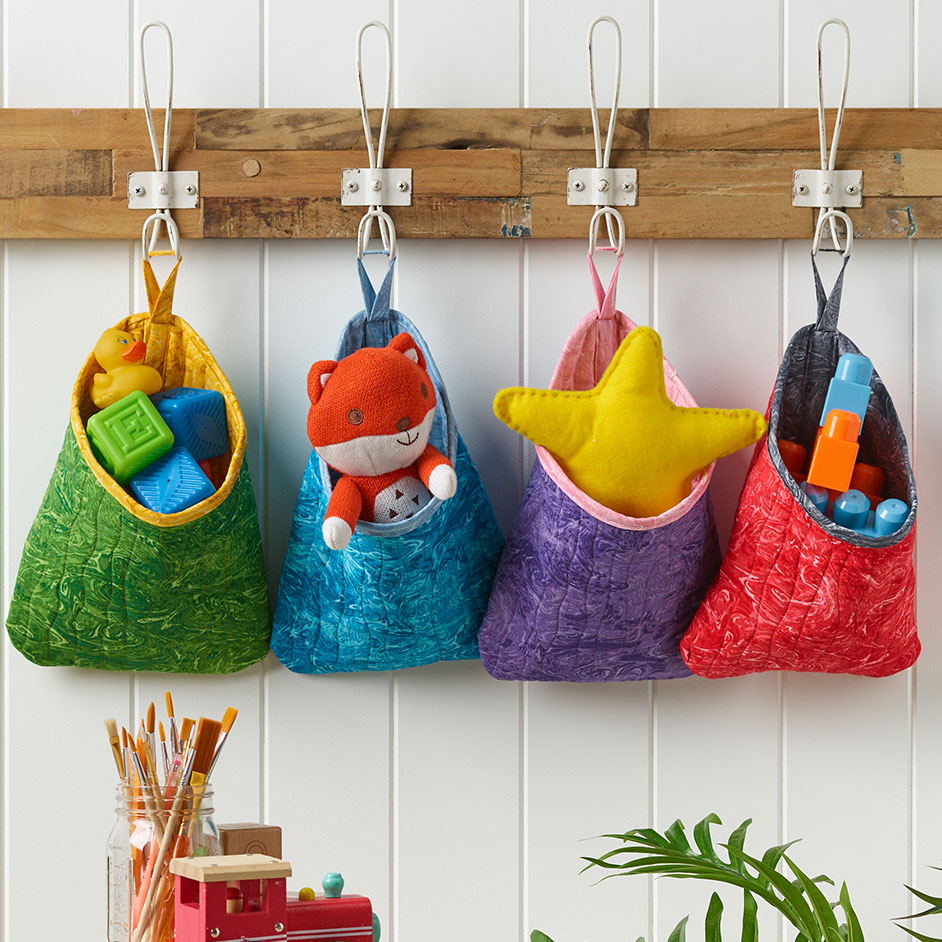
VENEER HANGING PODS

LEVEL: EASY
WHAT YOU'LL NEED:
- Fabrics are from 'Veneer Blender' range
- 30cm Fabric A - Red (outer)
- 40cm Fabric B - Grey (lining & binding)
- 30cm Fabric C - Aqua (outer)
- 40cm Fabric D - Lt Blue (lining & binding)
- 30cm Fabric E - Purple (outer)
- 40cm Fabric F - Pink (lining & binding)
- 30cm Fabric G - Green (outer)
- 40cm Fabric H - Yellow (lining & binding)
- 30m x 250cm wide Legacy cotton batting
- Matching Gutermann 100% cotton thread
- Rotary cutter, mat & quilters rulers
- Quilting pins, tape measure
- Scissors, seam ripper
- Hand needle
- Sewing machine with 1/4" foot & walking foot
All fabrics should be 100% cotton, washed & pressed. 1/4" seam allowance used throughout unless otherwise indicated.
Read all instructions carefully before commencing the project.
INSTRUCTIONS
CUTTING
Press all fabrics in half lengthways. Place template provided on the fold and cut out one piece from all fabrics.
From each of Fabrics B, D, F & H cut - 1 x 21/4" strip across the width of fabric for binding and tab, and one 1 1/2" x 12" strip for back seam.
Open out cut Fabrics A, C, E & F use as templates to cut shapes from batting.
POD
Step 1. With lining (B) right side down, place batting then outer fabric (A) right side up on top. Align all edges and pin to hold layers together.
Step 2. Attach walking foot to sewing machine and quilt the layers together from edge to edge using a wavy line design or as desired.
Step 3. Fold in half, right sides together and pin long back seam. Sew together then trim away batting from seam allowance. Press seam open.
Step 4. Take (B) 1 1/2" x 12" strip, press in half lengthways. Open out, fold each long edge into the centre and press, strip is 3/4" wide. Place strip over centre back seam and pin down each side. Hand sew or topstitch strip in place taking care not to stitch through front of pod.
Step 5. With right sides facing, press in half with seam down centre. Pin together along bottom edge and stitch. Trim away batting from seam allowance. Measure 1 1/4" up from bottom edge on each folded side and mark. Measure 1" in from each side edge and mark. Draw a line to join the marks creating a curved edge. Sew along the curve and trim seam to 1/8". Zigzag around the curve along the bottom edge and around other corner curve to neaten and prevent fraying. Turn right side out and push corners out to shape.
Step 6. To create the hanging tab cut a 6" strip from the 21/4" (B) binding strip. Press strip in half lengthways. Open out, fold edge to the crease and press. Fold other edge in to the crease and press. Refold in half on the original crease and press. Topstitch down both long edges. Fold tab in half and pin to outer top edge at back seam with raw edges aligned. Baste 1/8" from edge.
Step 7. Take remaining length of 2 1/4" binding strip, and press in half lengthways. Starting to one side of centre back seam, pin binding strip to inside with raw edges aligned. Sew in place, overlapping ends and trimming off excess binding strip. Fold binding over the edge to right side and pin. Topstitch binding in place.


