 | ||
| Your browser is not supported. | ||
|
Please browse our site using any of the following options:
| ||
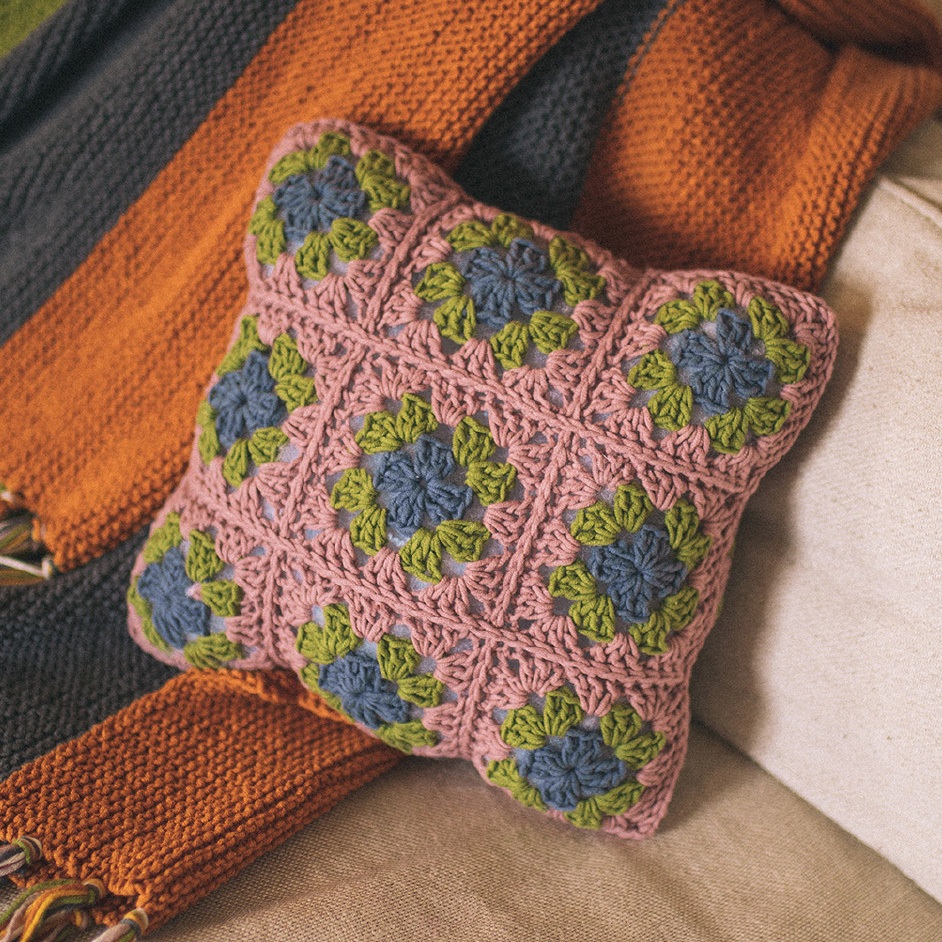
THE COTTONY ONE GRANNY SQUARE PILLOW

Level: Easy
What you'll need:
- Lion Brand® The Cottony One 100g:
- 1 ball (A)
- 1 ball (B)
- 1 ball (C)
- Large-eyed blunt needle
- 5 mm Crochet hook (Size H-8)
- 11 x 11 in. (28 x 28 cm) Pillow
Finished Size
About 11 x 11 in. (28 x 28 cm)
Tension
1 Square = about 3 1/2 x 3 1/2 in. (9 x 9 cm)
Instructions
- Pillow is made from 2 identical pieces: Back and Front.
- Each piece is made from 9 Granny Squares crocheted together into a larger square, consisting of 3 rows of 3 Granny Squares each.
- Each Granny Square is worked in joined rnds with RS always facing you. Do not turn at the beg of rnds. Each rnd is worked using a different yarn colour. To change yarn colour, fasten off then join new yarn colour as instructed.
Abbreviations
beg = begin(ning)
ch = chain
ch-sp(s) = chain space(s) previously made
dc = double crochet
rep = repeat
rnd(s) = round(s)
RS = right side
sl st = slip stitch
st(s) = stitch(es)
WS = wrong side
Every effort has been made to produce accurate and complete instructions. We cannot be responsible for variance of individual makers, human error, or typographical mistakes.
©2023 Lion Brand Yarn Company, all rights reserved.
Granny Squares (Make 18)
With A, ch 4. Join with sl st in first ch to form a ring.
Rnd 1 (RS): With A, ch 3 (counts as dc), 2 dc in ring, (ch 2, 3 dc in ring) 3 times, ch 2. Join with sl st in top of beg ch-3 - you will have 4 ch-2 sps and 12 dc in this rnd (Four 3-dc groups). Fasten off.
Rnd 2: From RS, join B with a sl st in any ch-2 sp, ch 3 (counts as dc), 2 dc in same ch-2 sp, (3 dc, ch 2, 3 dc) in next ch-2 sp (corner made), (3 dc, ch 2, 3 dc) in each of next 2 ch-2 sps, 3 dc again in first ch-2 sp, ch 2. Join with sl st in top of beg ch-3 - 24 dc and 4 corner ch-2 sps (Two 3-dc groups along each of 4 sides between corner ch-2 sps). Fasten off.
Rnd 3: From RS, join C with a sl st in any corner ch-2 sp, ch 3 (counts as dc), 2 dc in same corner ch-2 sp, 3 dc in next sp between 3-dc groups, (3 dc, ch 2, 3 dc) in next corner ch-2 sp, 3 dc in next sp between 3-dc groups, rep from 2 more times, 3 dc again in first corner ch-2 sp, ch 2. Join with sl st in top of beg ch-3 - 36 dc and 4 corner ch-2 sps (Three 3-dc groups along each of 4 sides between corner ch-2 sps). Fasten off.
Back
Join Granny Squares into Strips (make 3 strips)
Match sts and corners along one side of 2 Granny Squares. From RS, working in back loops only of both Squares, join C with sl st in corner ch-2 sp at beg of edge, sl st in each st to next corner ch-2 sp, and sl st in corner ch-2 sp. Fasten off.
Rep to join one more Square to make a strip of 3 Granny Squares.
Rep to make 2 more strips of 3 Granny Squares each. Join Strips
Match sts along long edges of 2 strips. With C, join the strips together using the same method as used for joining Granny Squares together. Rep to join the last strip to form a large square consisting of 3 rows of 3 Granny Squares each.
Front
Make same as Back, using the remaining 9 Granny Squares.
Finishing
- Edges of Back and Front are crocheted together. Pillow form is inserted before 4th edge is seamed.
- The pillow form will show through the spaces in the Granny Squares. If you like, wrap the form with fabric in a colour to coordinate before inserting it into the pillow cover.
Hold Back and Front with WS together and sts matching. From RS, working in back loops only of both thicknesses, join C with sl st in any corner ch-2 sp, sl st in each st to next corner ch-2 sp, (sl st, ch 1, sl st) in corner ch-2 sp.
Rep from 2 more times, insert pillow form, sl st in each st to first corner ch-2 sp, sl st again in first ch-2 sp. Join with sl st in first sl st. Fasten off. Weave in ends.


